> ## Documentation Index
> Fetch the complete documentation index at: https://docs.etho.net/llms.txt
> Use this file to discover all available pages before exploring further.
# Meta
> Connect your Meta Business account to manage Facebook and Instagram ads with System User Token authentication
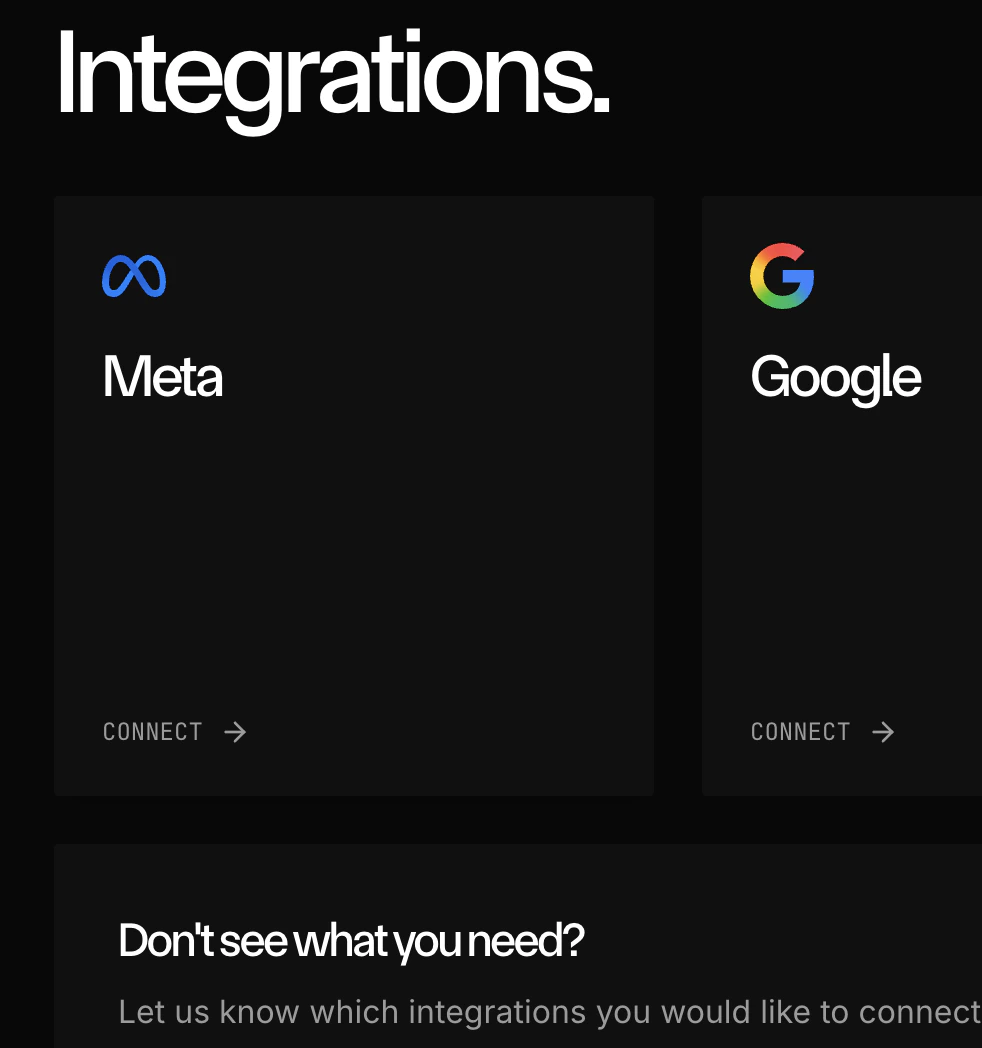 Meta integration connects your Facebook and Instagram advertising accounts to Olympus, enabling automated campaign management, audience targeting, and performance tracking. This guide walks you through the complete System User Token flow for secure, long-term API access.
## Prerequisites
You need an active Facebook account to create a Business Portfolio and complete the integration setup.
***
## Step 1: Create a Business Portfolio
Create your Meta Business Portfolio to manage all your business assets in one place.
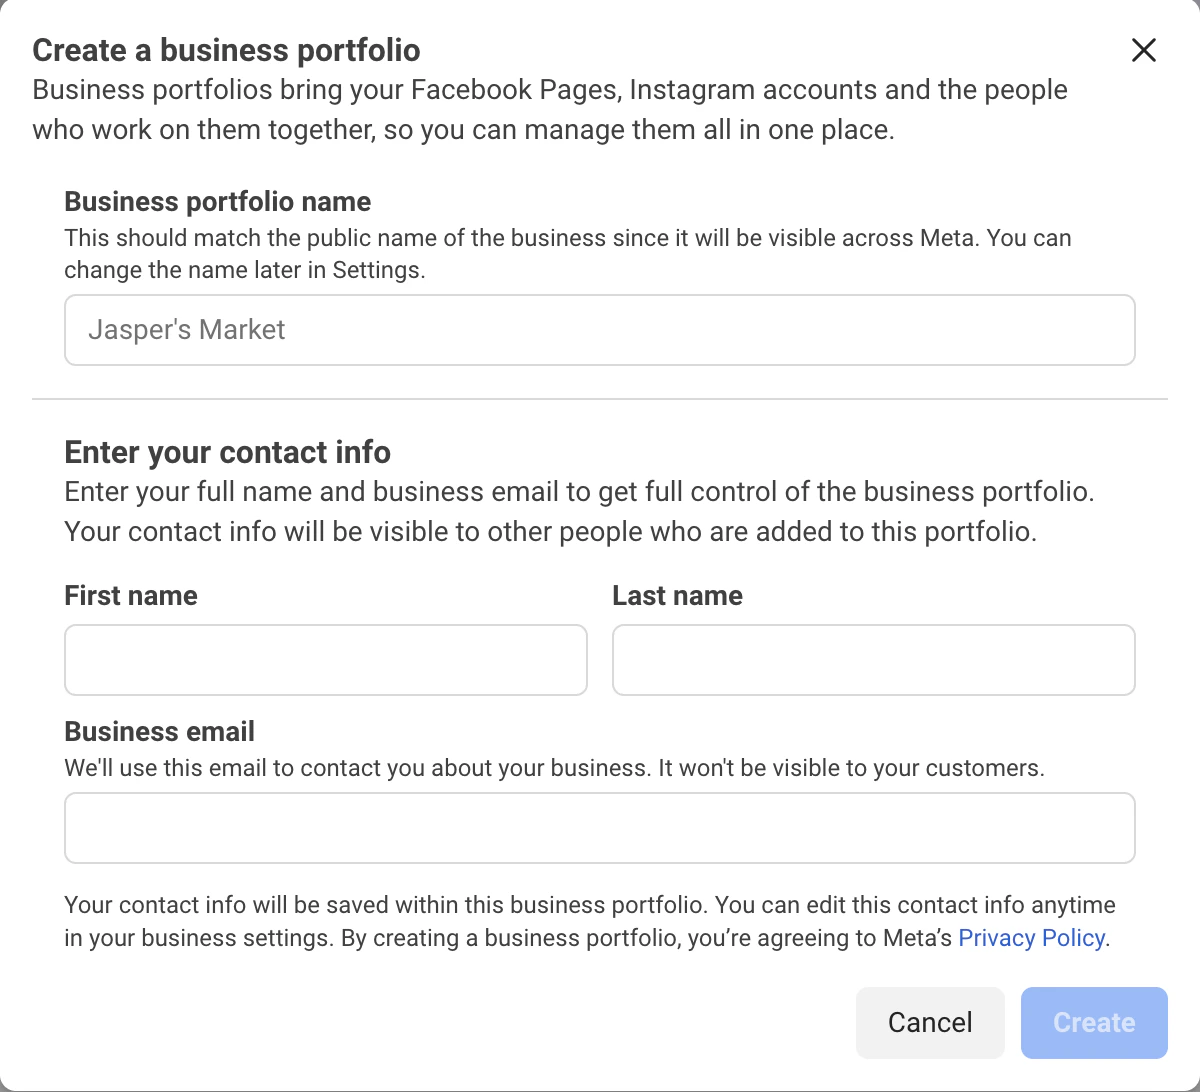
Navigate to [business.facebook.com](https://business.facebook.com) and sign in with your Facebook account.
Fill in the required form to create your business portfolio with your business name and details.
Meta integration connects your Facebook and Instagram advertising accounts to Olympus, enabling automated campaign management, audience targeting, and performance tracking. This guide walks you through the complete System User Token flow for secure, long-term API access.
## Prerequisites
You need an active Facebook account to create a Business Portfolio and complete the integration setup.
***
## Step 1: Create a Business Portfolio
Create your Meta Business Portfolio to manage all your business assets in one place.
Navigate to [business.facebook.com](https://business.facebook.com) and sign in with your Facebook account.
Fill in the required form to create your business portfolio with your business name and details.
 ***
## Step 2: Add a Facebook Page
Connect or create a Facebook Page for your business within your portfolio.
Go to **Business Settings** in your Business Portfolio dashboard.
In the sidebar under **Accounts**, click **Pages**.
***
## Step 2: Add a Facebook Page
Connect or create a Facebook Page for your business within your portfolio.
Go to **Business Settings** in your Business Portfolio dashboard.
In the sidebar under **Accounts**, click **Pages**.
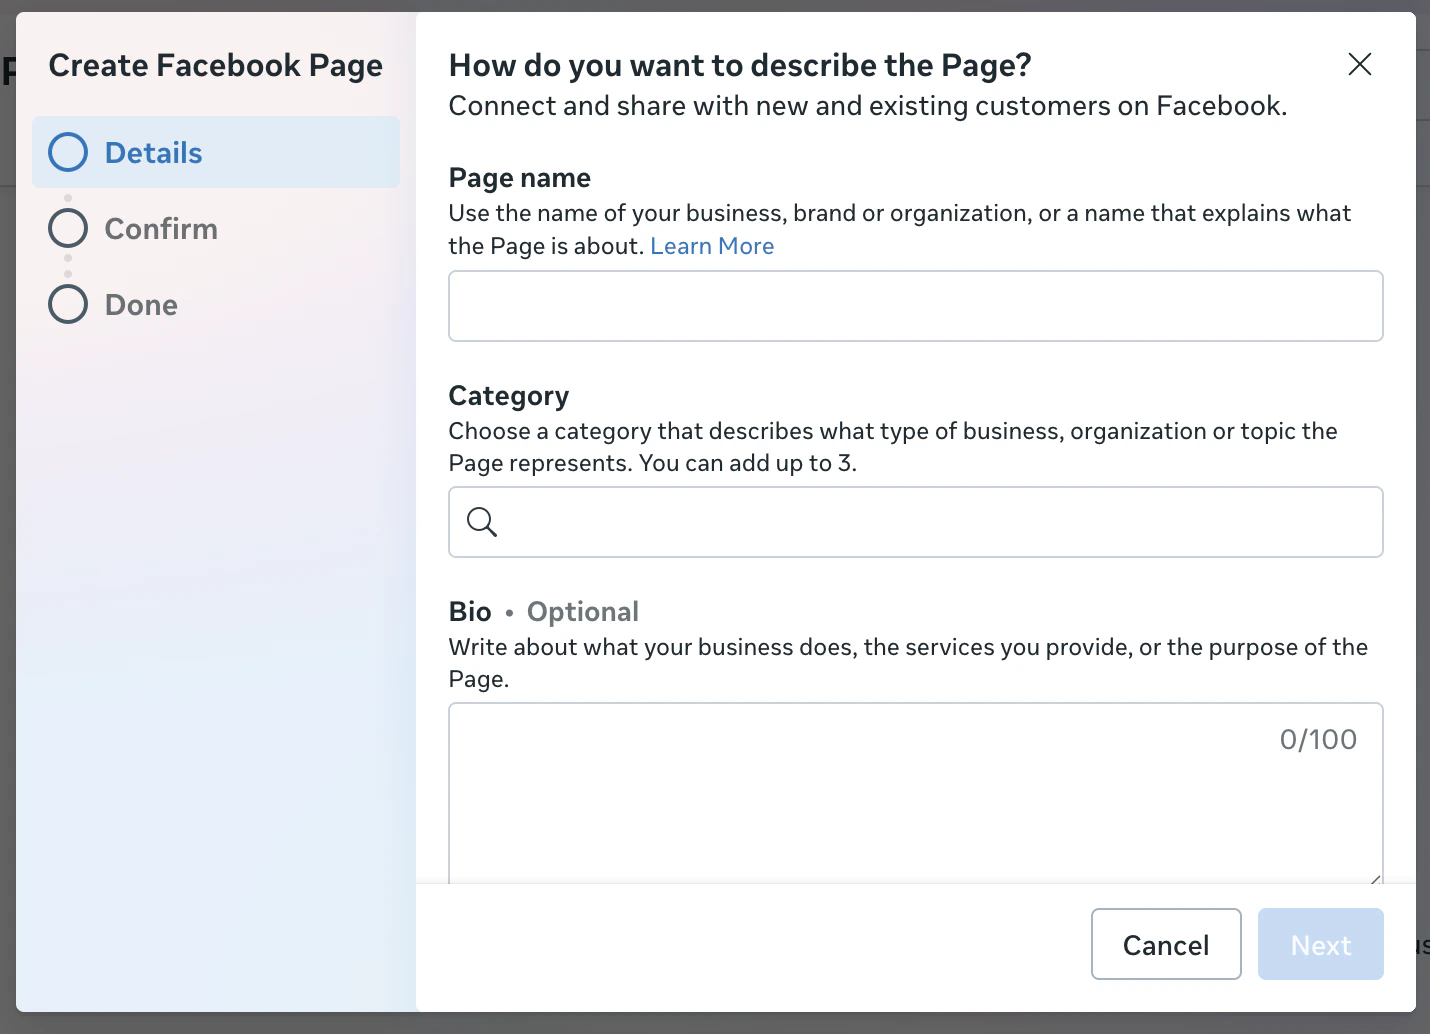
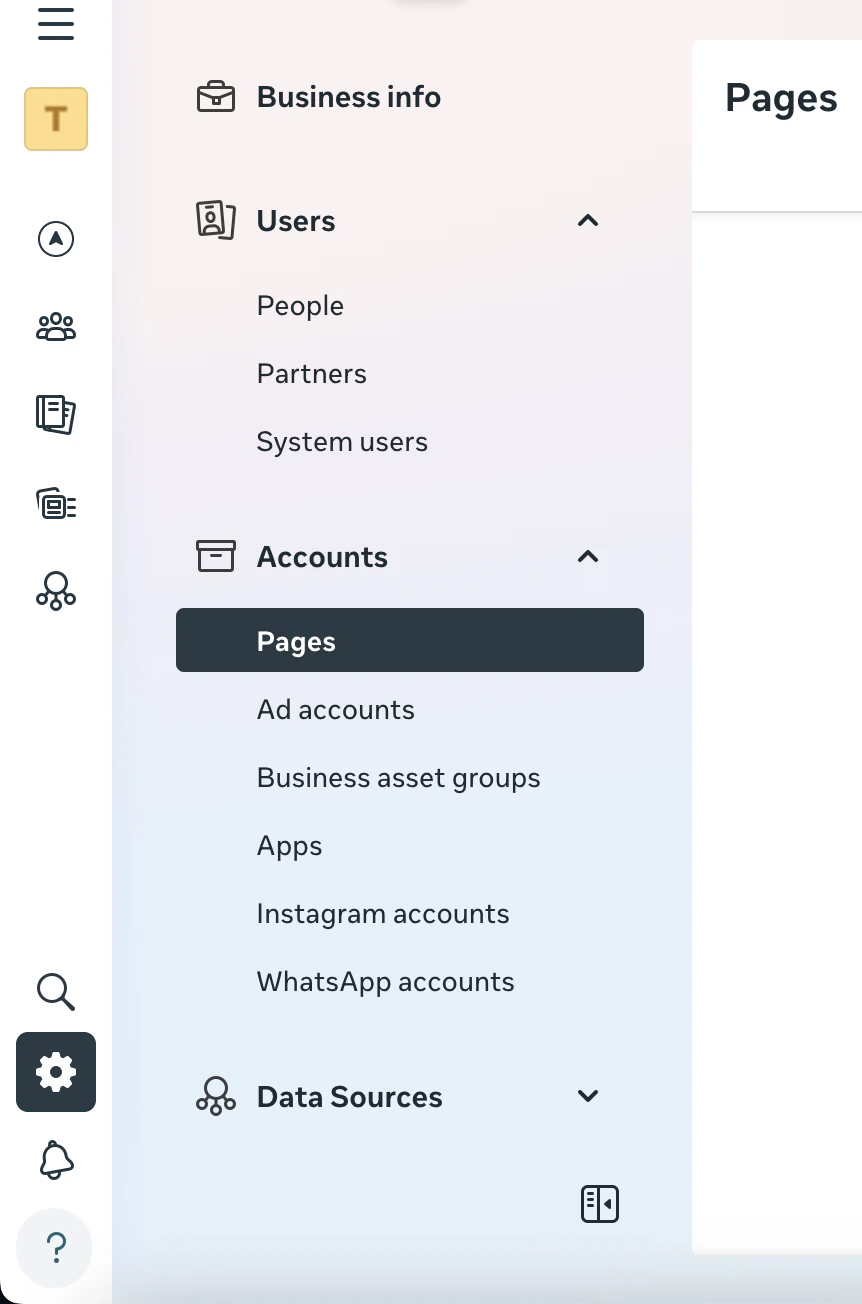 Click **Add** and choose to **Create a new page** or **Use an existing one**.
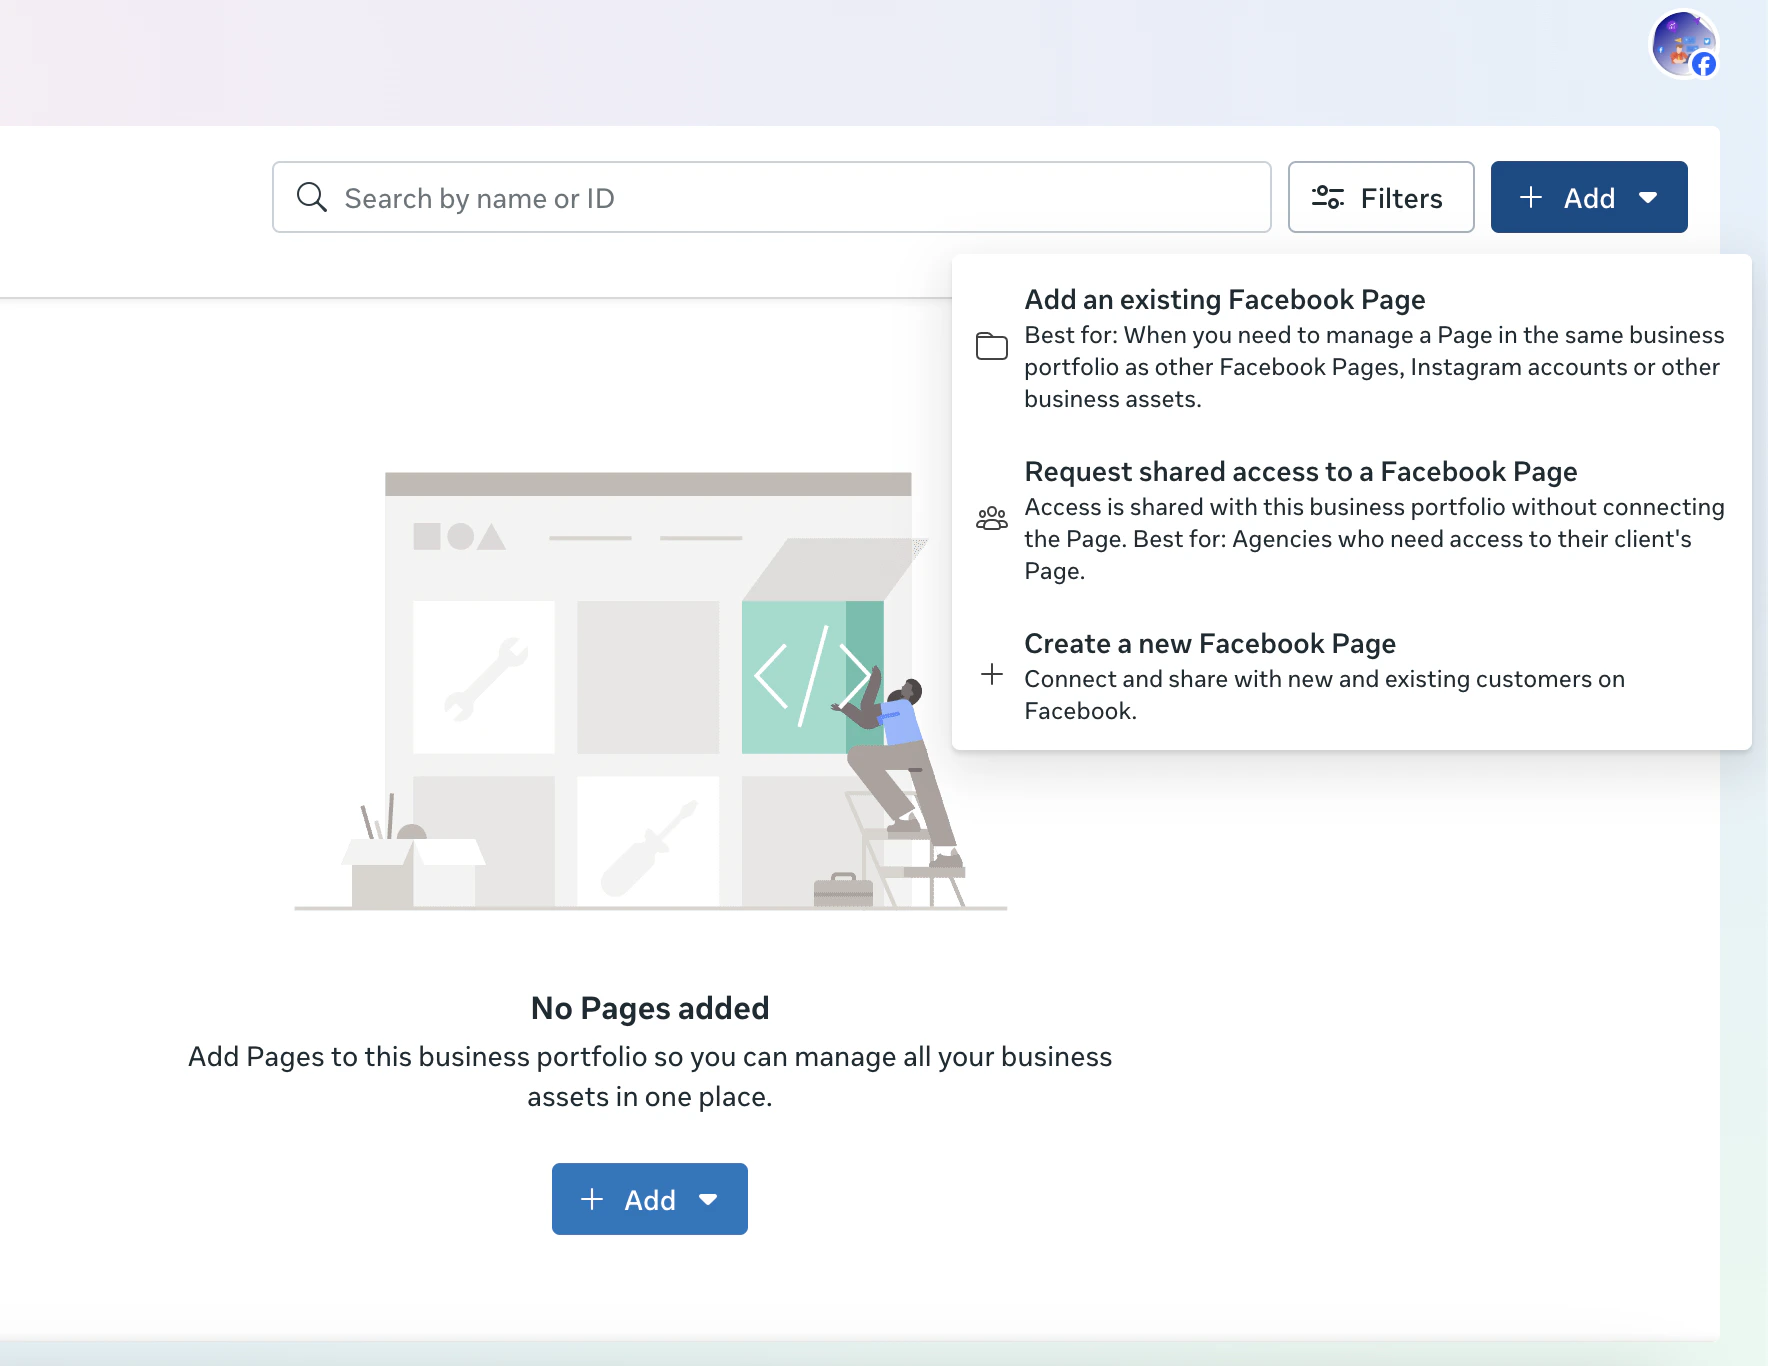 Fill in the form with your page name, category, and other required details to complete page creation.
 ***
## Step 3: Add an Ad Account and Payment Method
Set up your advertising account with a valid payment method to run campaigns.
In **Business Settings**, go to **Ad Accounts** from the sidebar.
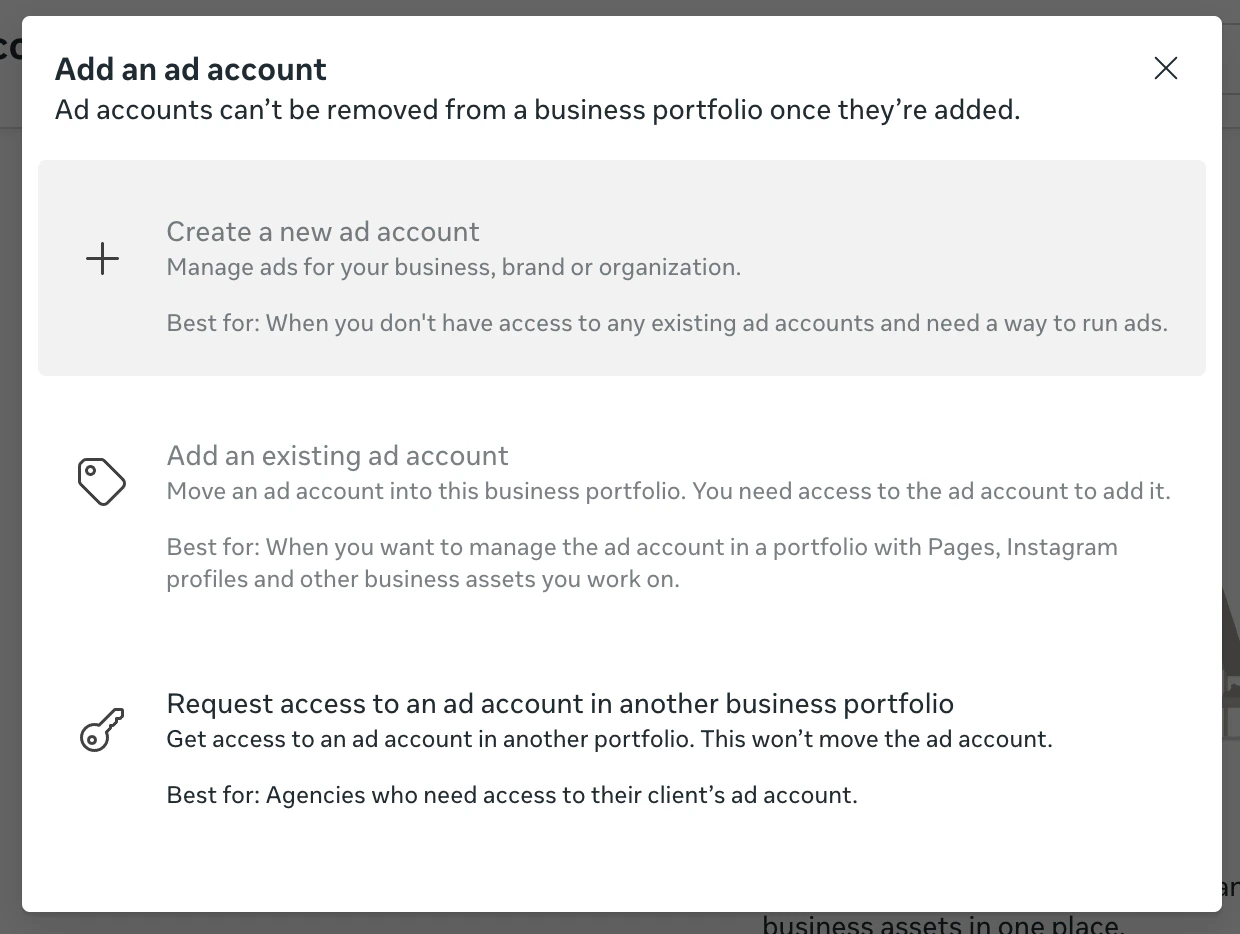
Click **Add** → **Create a new ad account**.
***
## Step 3: Add an Ad Account and Payment Method
Set up your advertising account with a valid payment method to run campaigns.
In **Business Settings**, go to **Ad Accounts** from the sidebar.
Click **Add** → **Create a new ad account**.
 Fill in required details such as **Time Zone** and **Country/Region**, then click **Create Ad Account**.
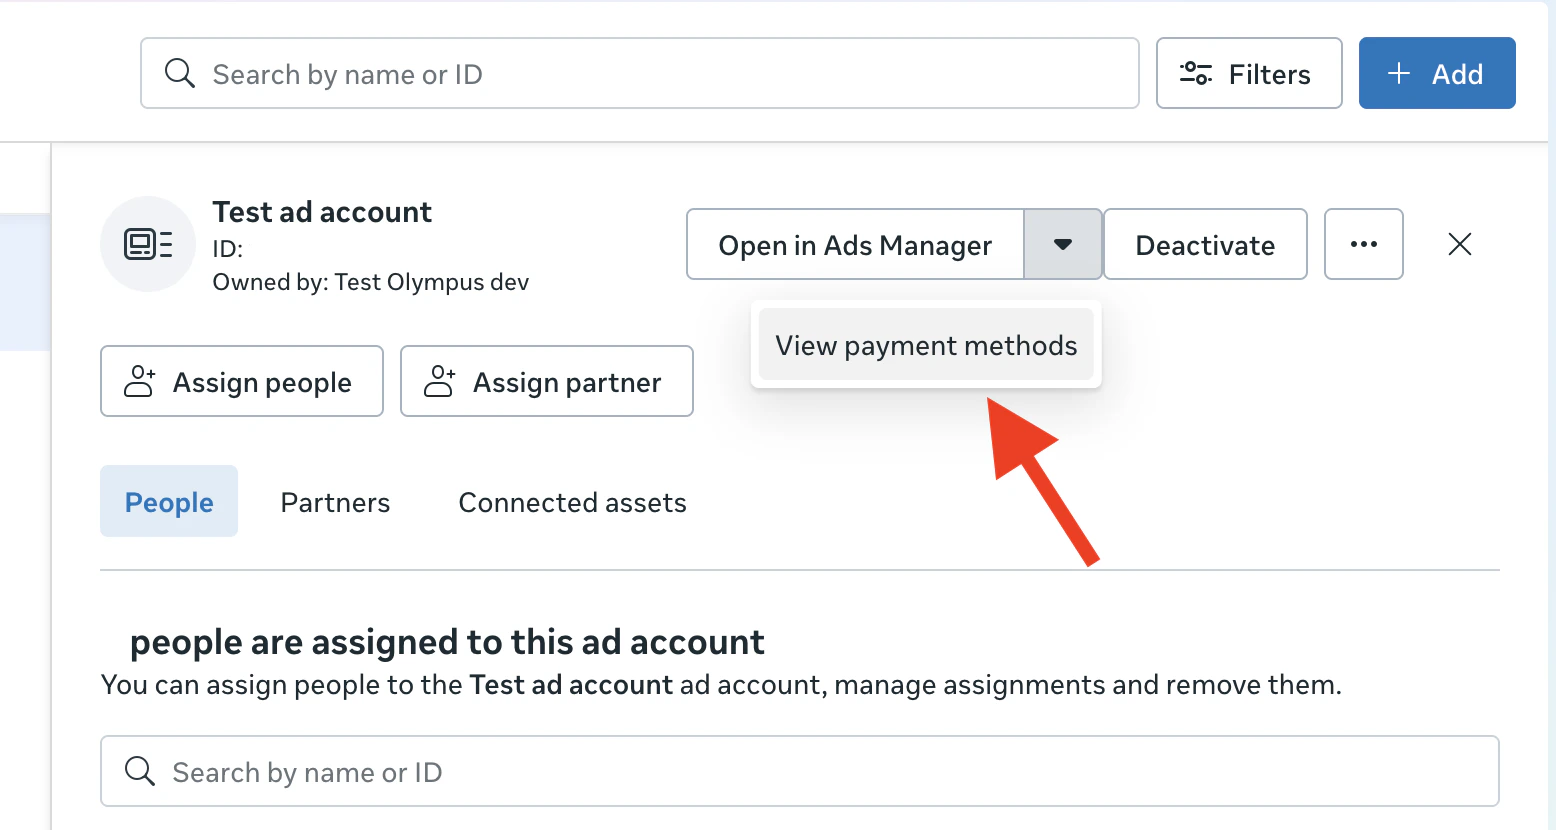
After creation, open the dropdown on your ad account and click **View Payment Methods**.
Fill in required details such as **Time Zone** and **Country/Region**, then click **Create Ad Account**.
After creation, open the dropdown on your ad account and click **View Payment Methods**.
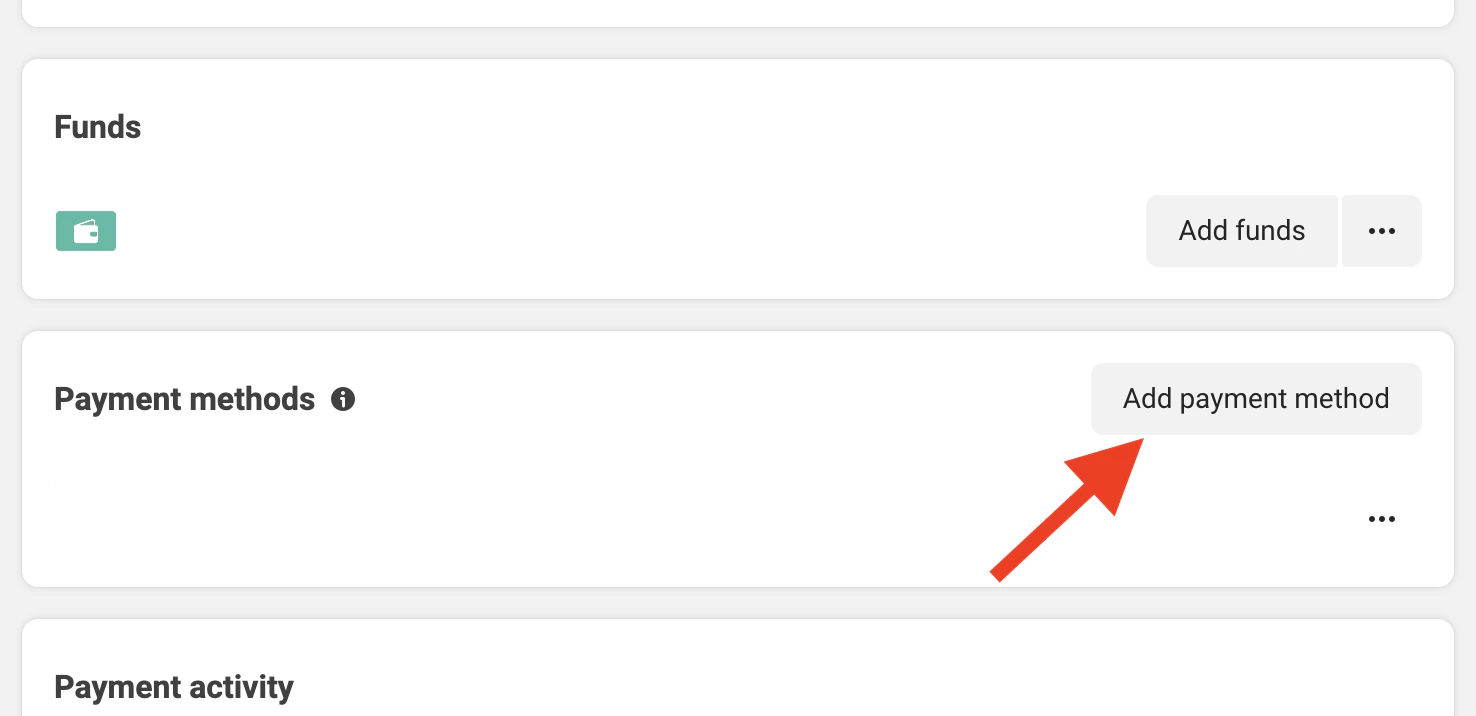
 Click **Add Payment Method** and fill in your payment details to enable ad spending.
 ***
## Step 4: Create a Developer App
Create a Meta Developer App to access the Marketing API.
In **Business Settings**, go to **Apps**.
***
## Step 4: Create a Developer App
Create a Meta Developer App to access the Marketing API.
In **Business Settings**, go to **Apps**.
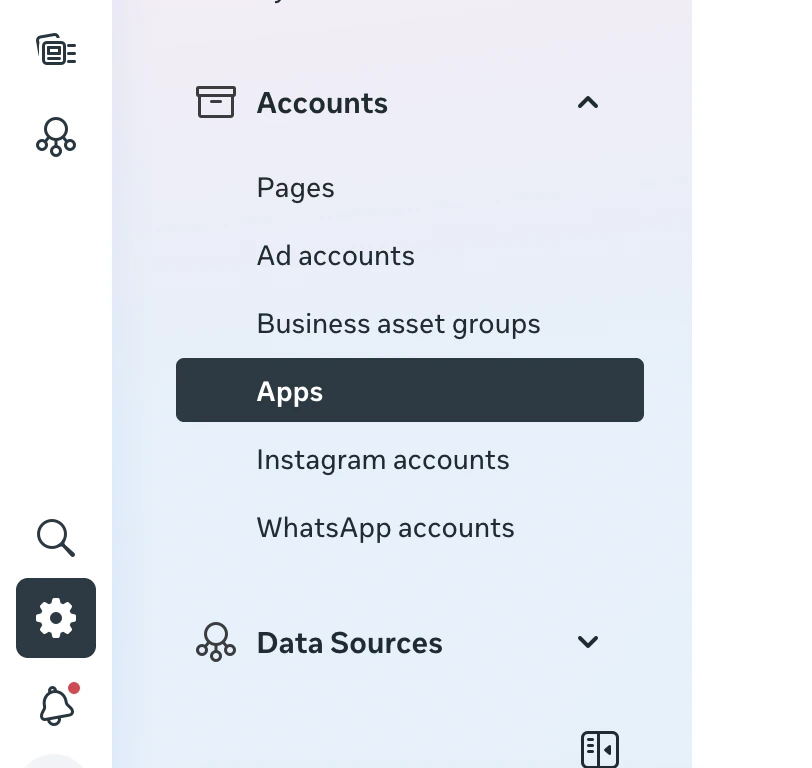 Click **Add** → **Create a new App ID**.
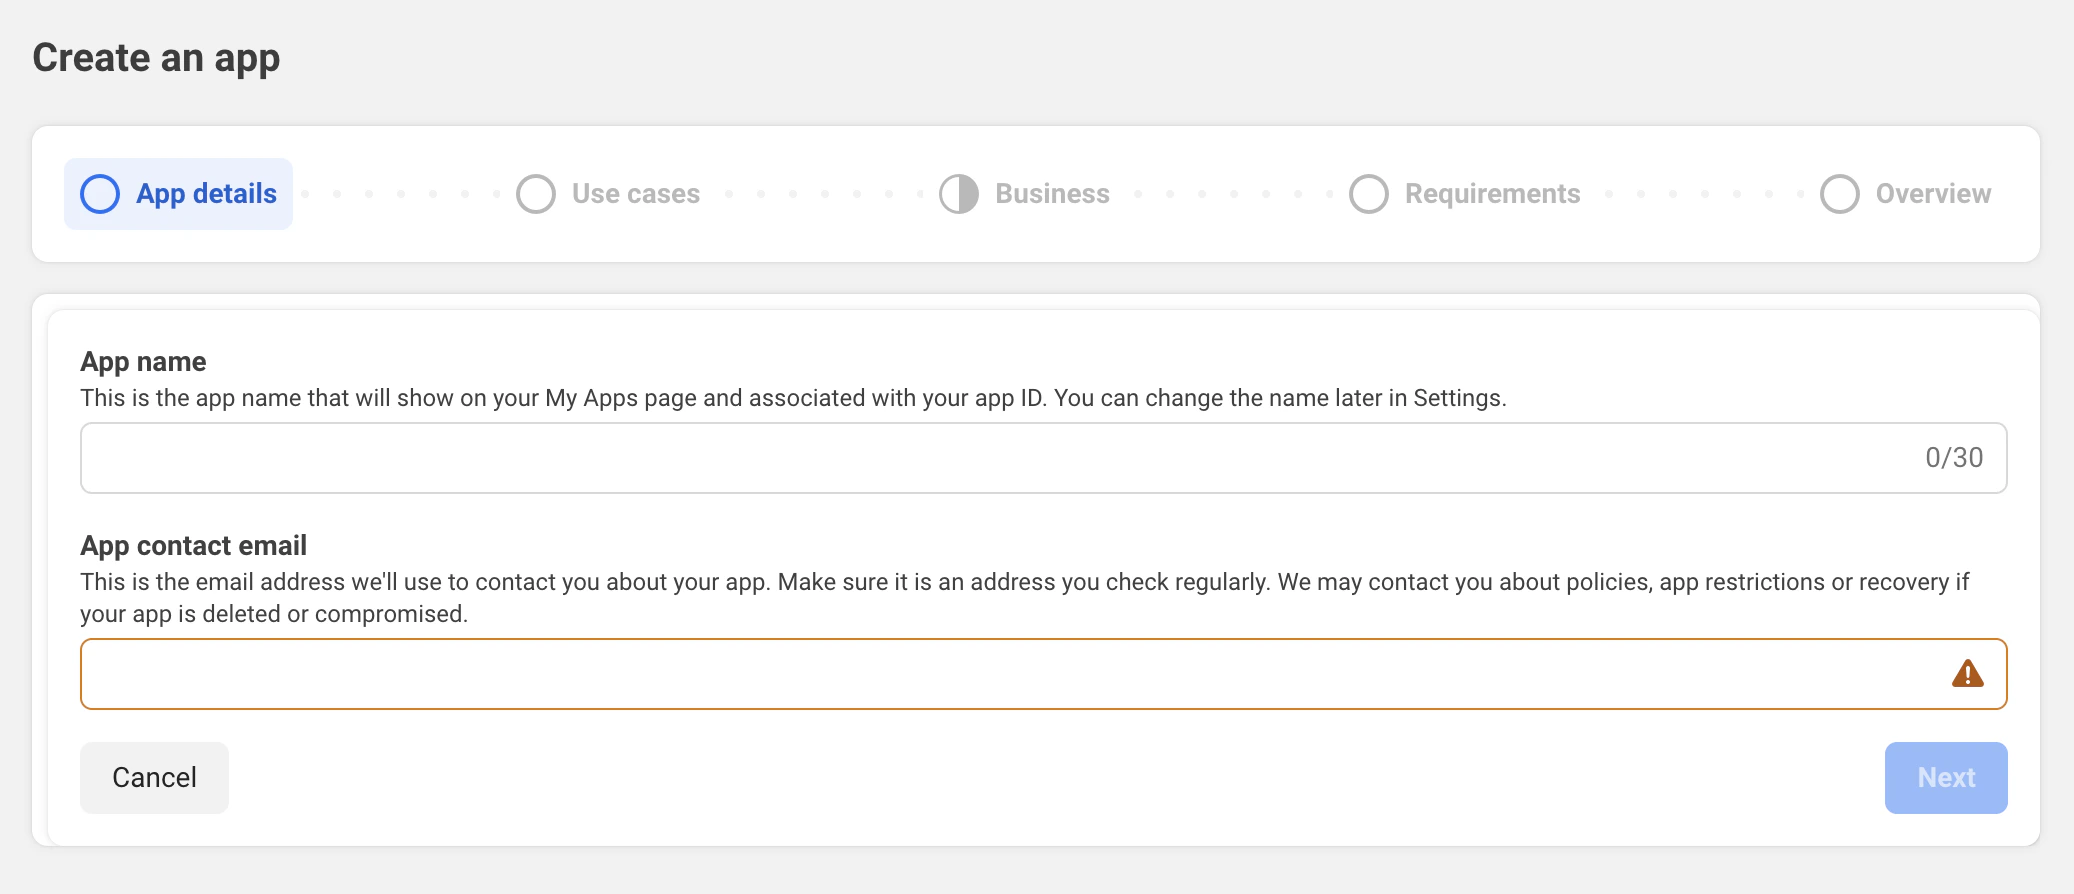
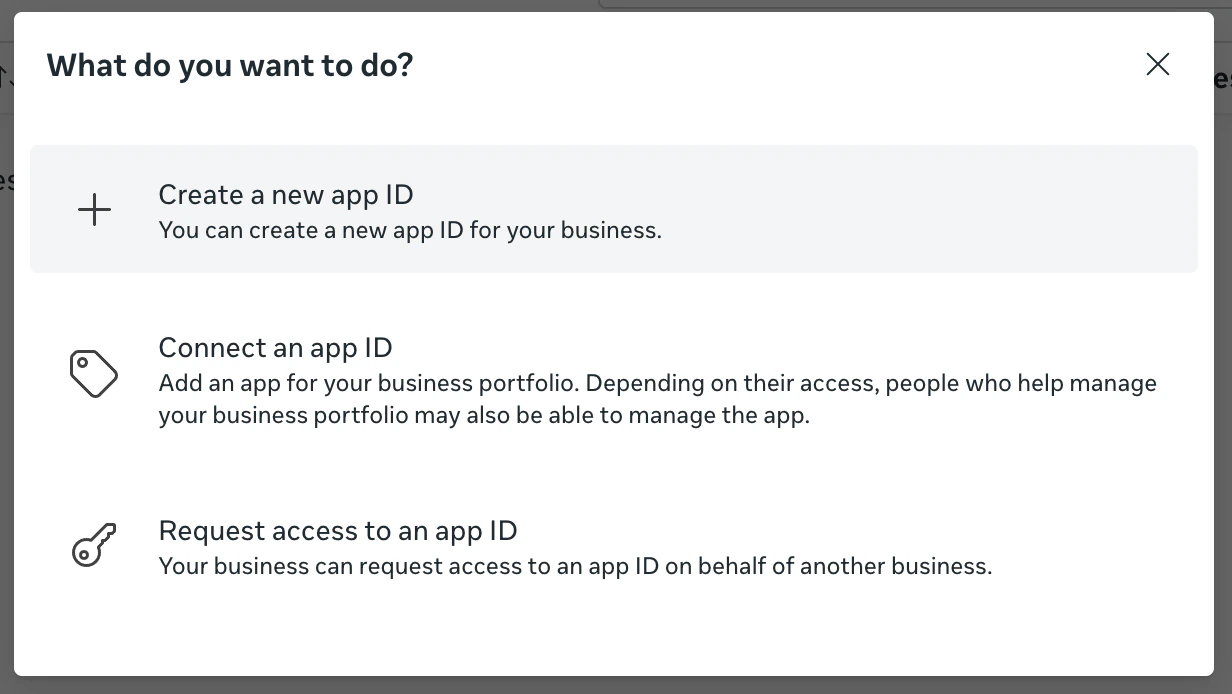 You will be redirected to [developers.facebook.com](https://developers.facebook.com) to complete app creation.
Enter your app name and contact email address.
You will be redirected to [developers.facebook.com](https://developers.facebook.com) to complete app creation.
Enter your app name and contact email address.
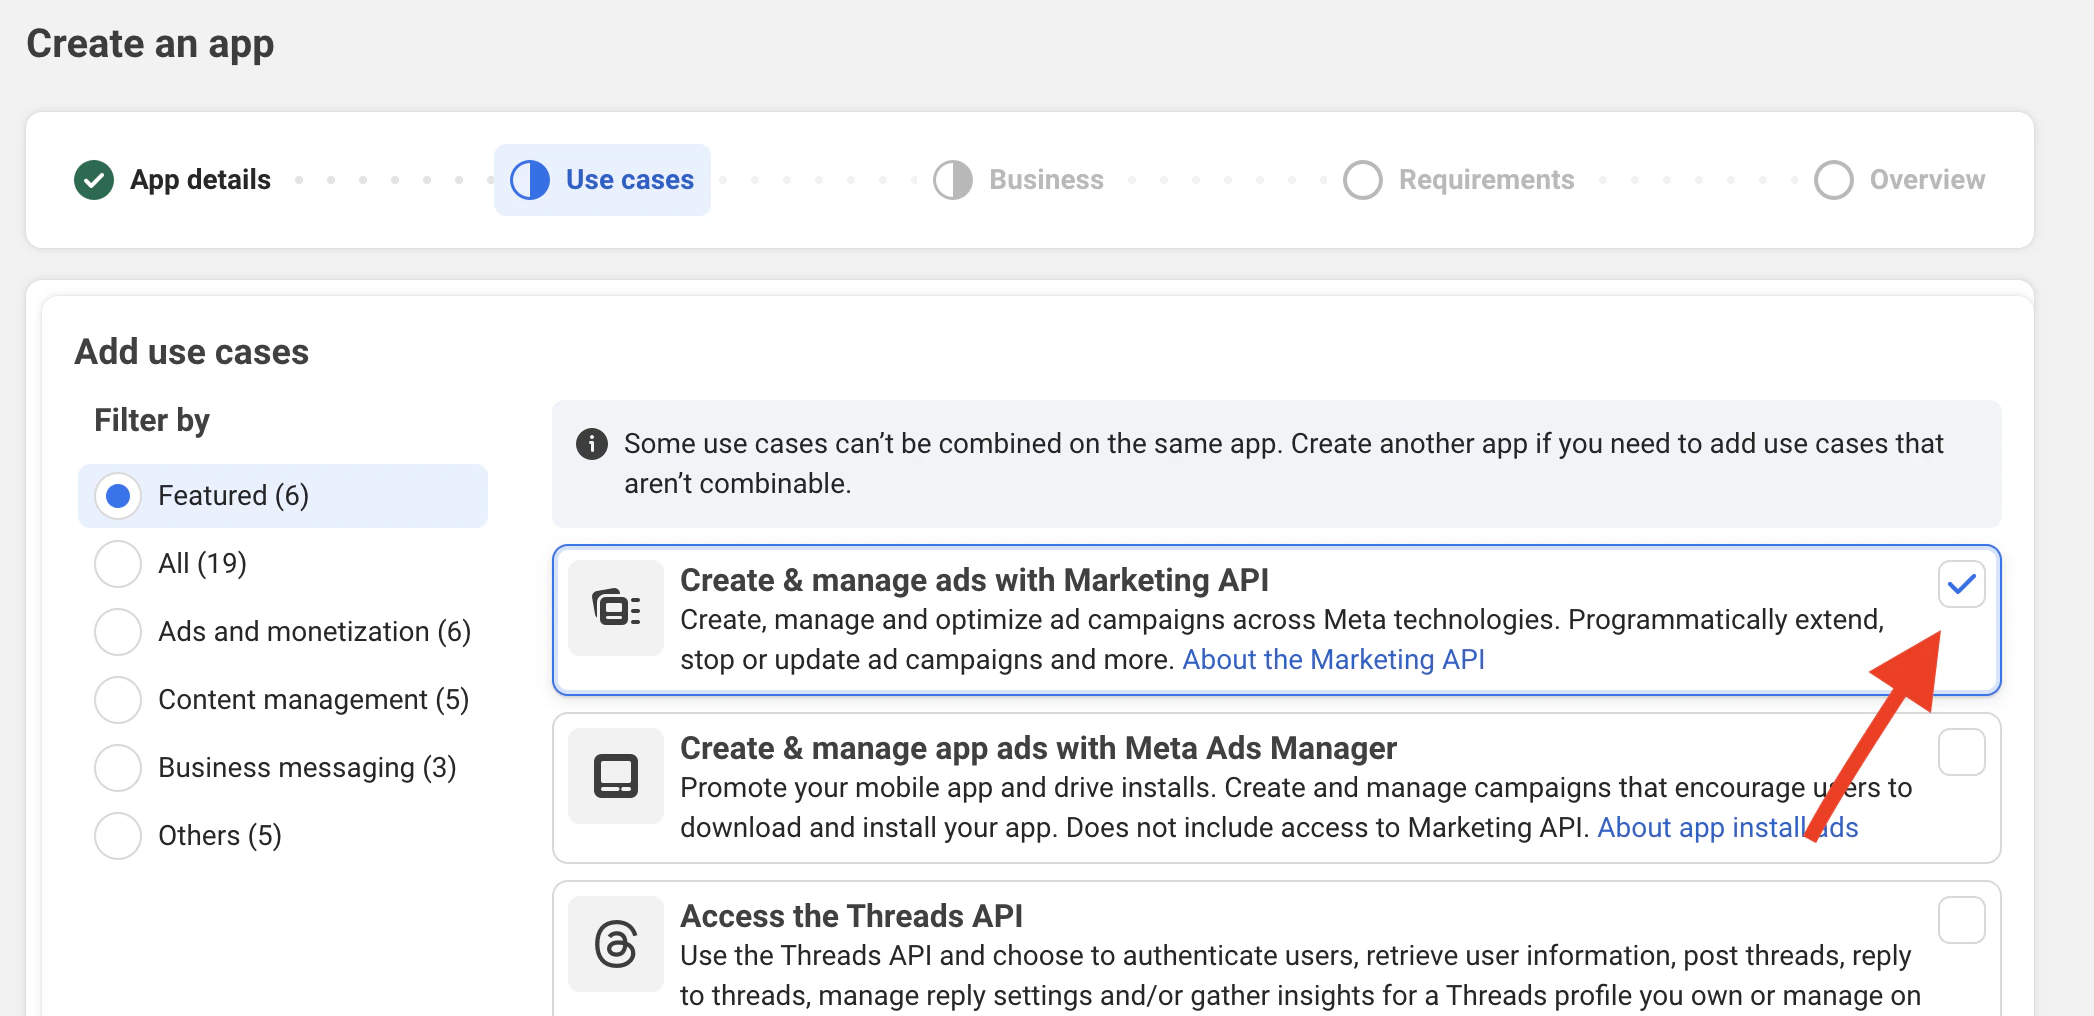
 Choose **Create & manage ads with Marketing API** as the use case for your app.
 Select the **Business Portfolio** you created earlier to associate with this app.
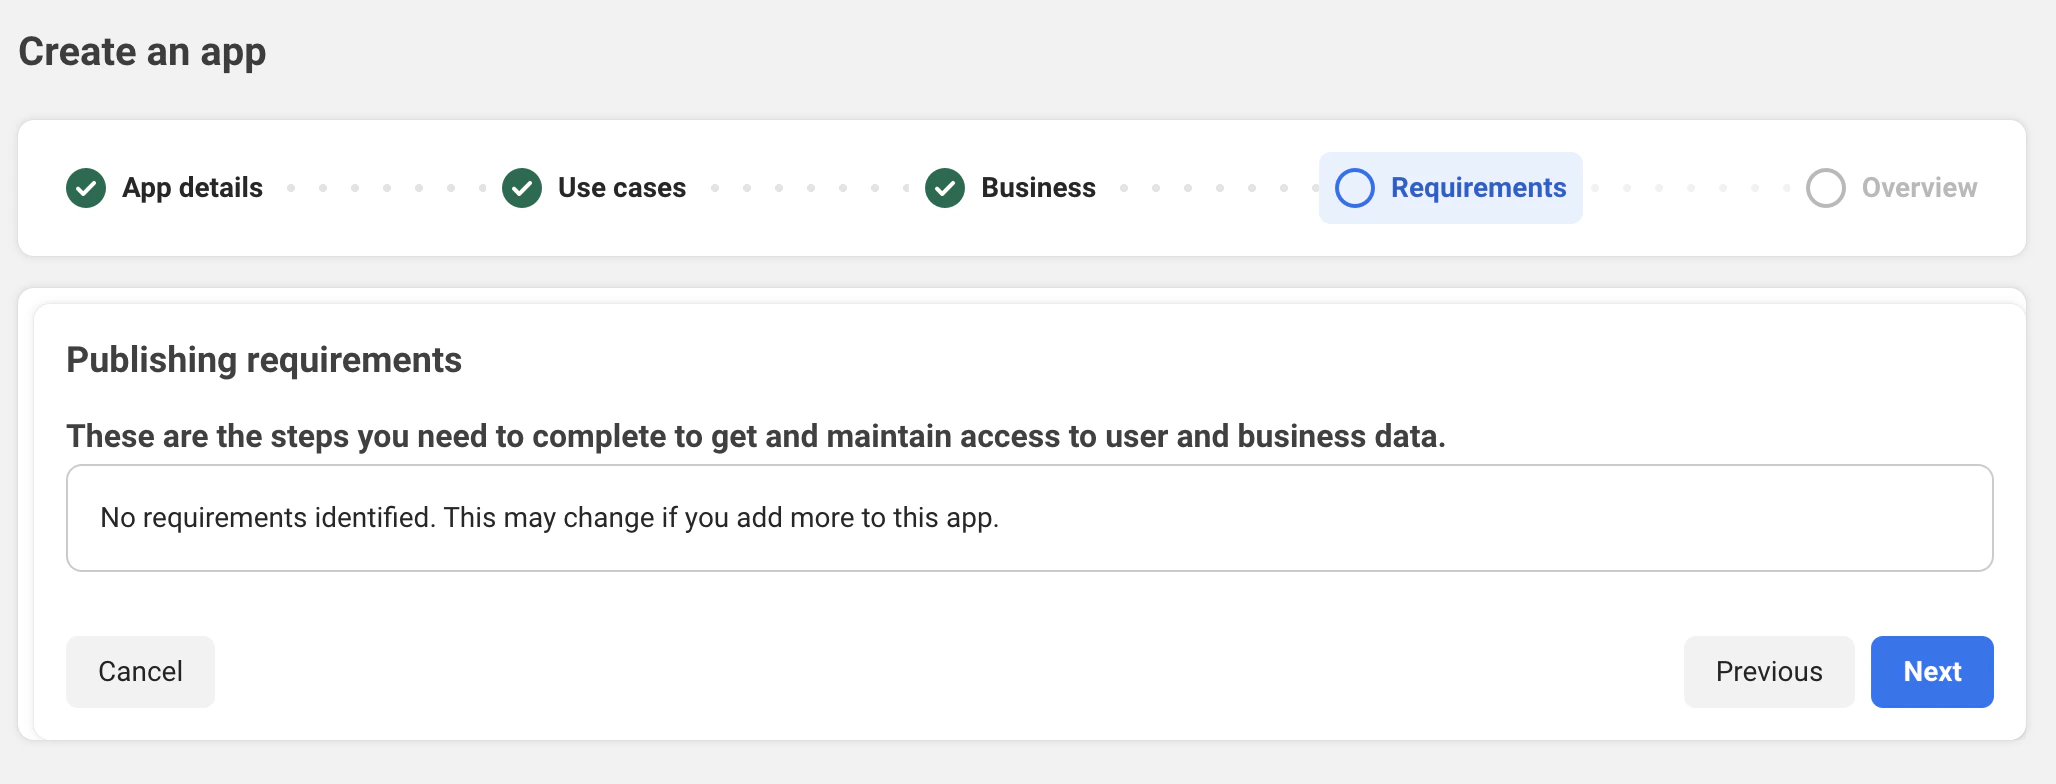
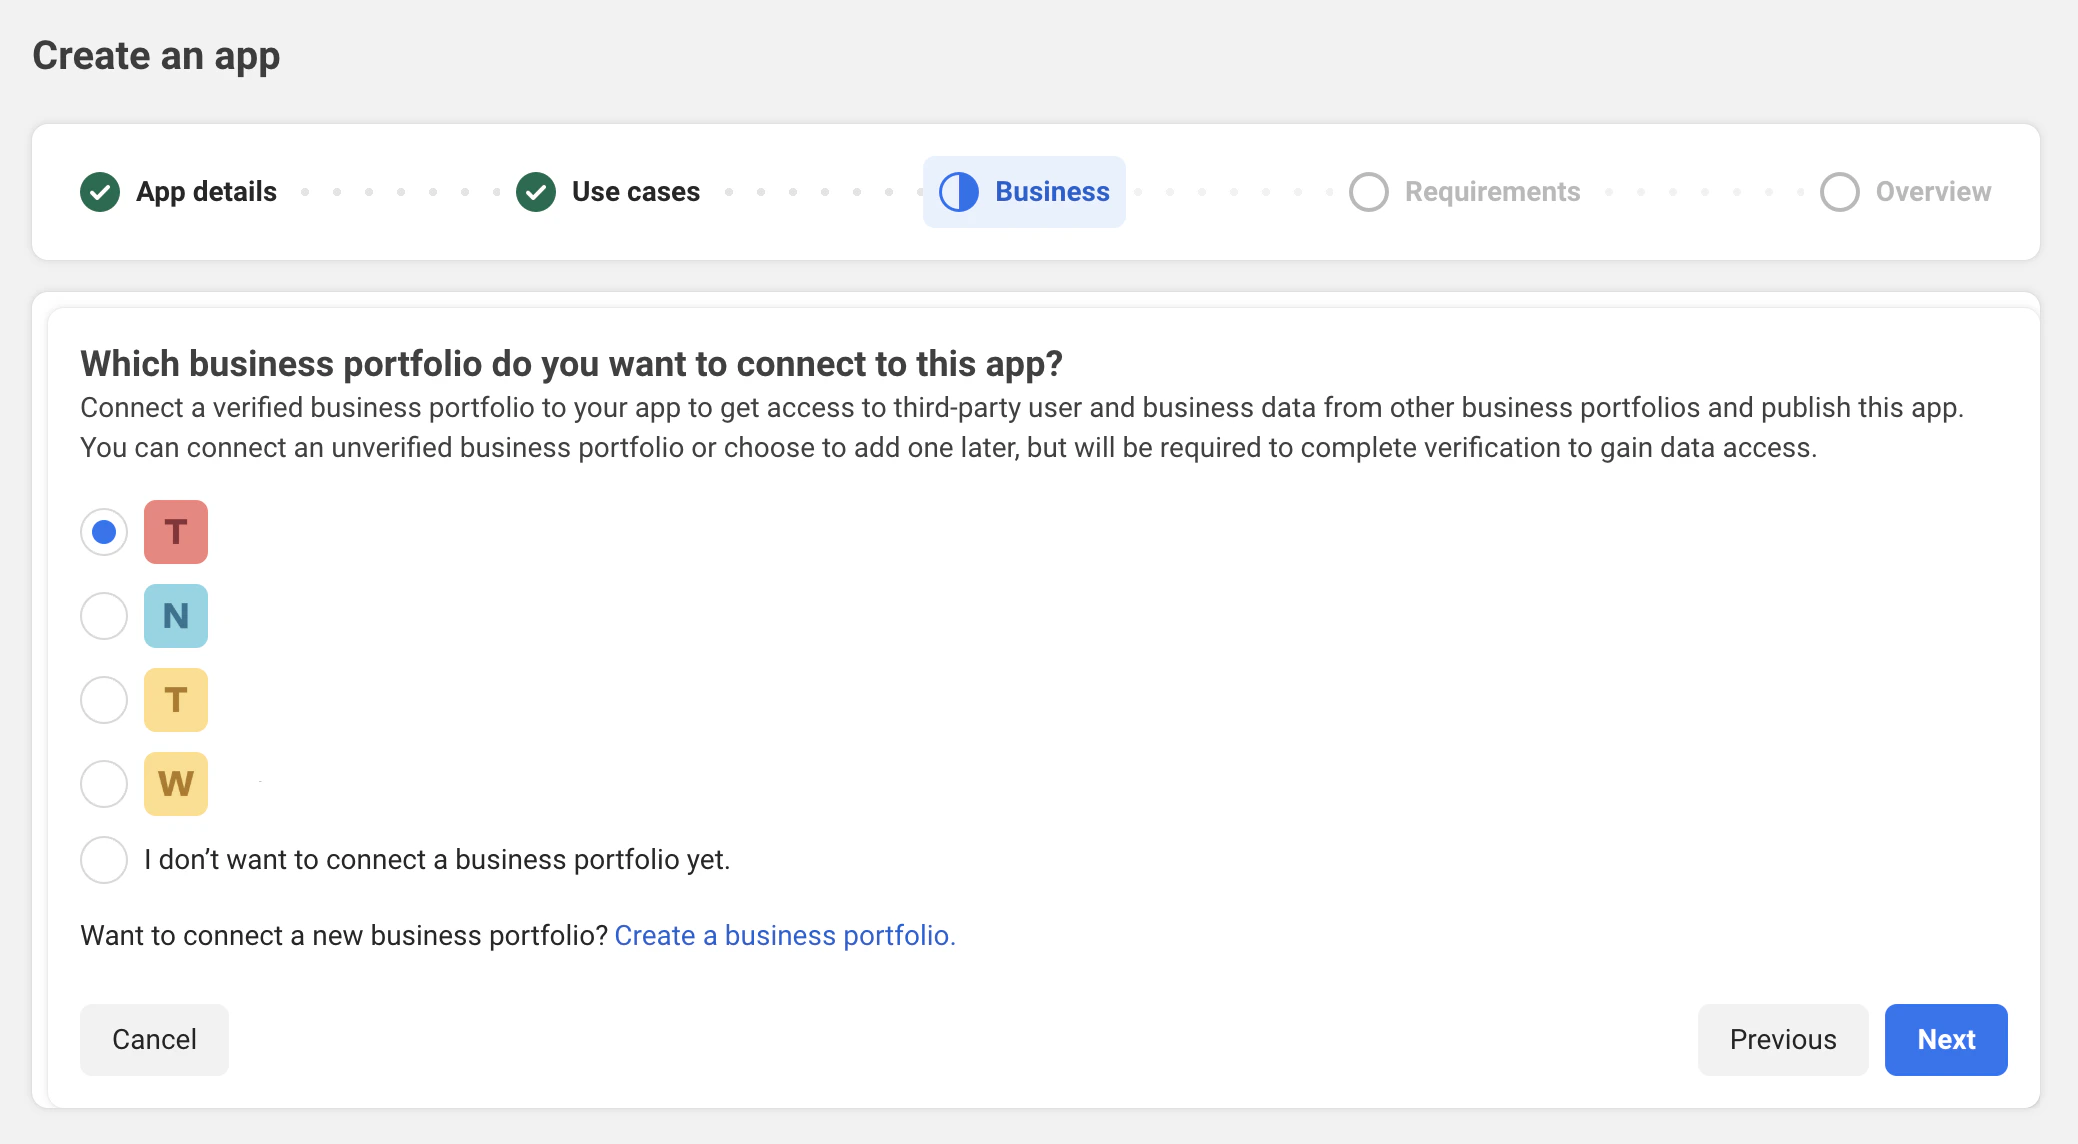 Click **Next** to proceed with app creation.
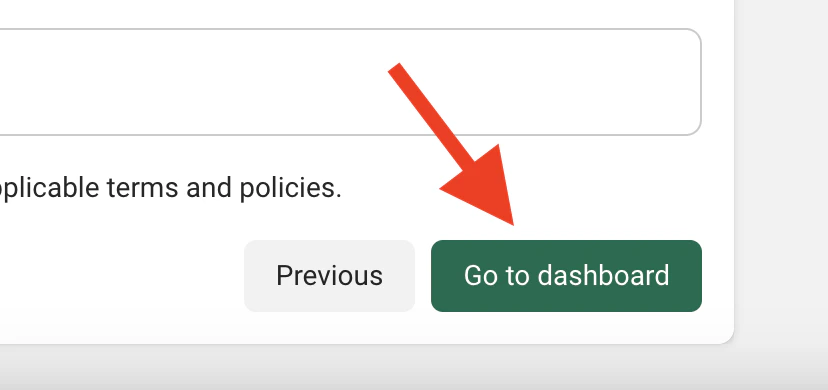
 On the Overview step, click **Go To Dashboard**. Enter your Facebook password when prompted.
 ***
## Step 5: Configure App Settings and Publish
Configure your app's privacy policy and publish it to enable full functionality.
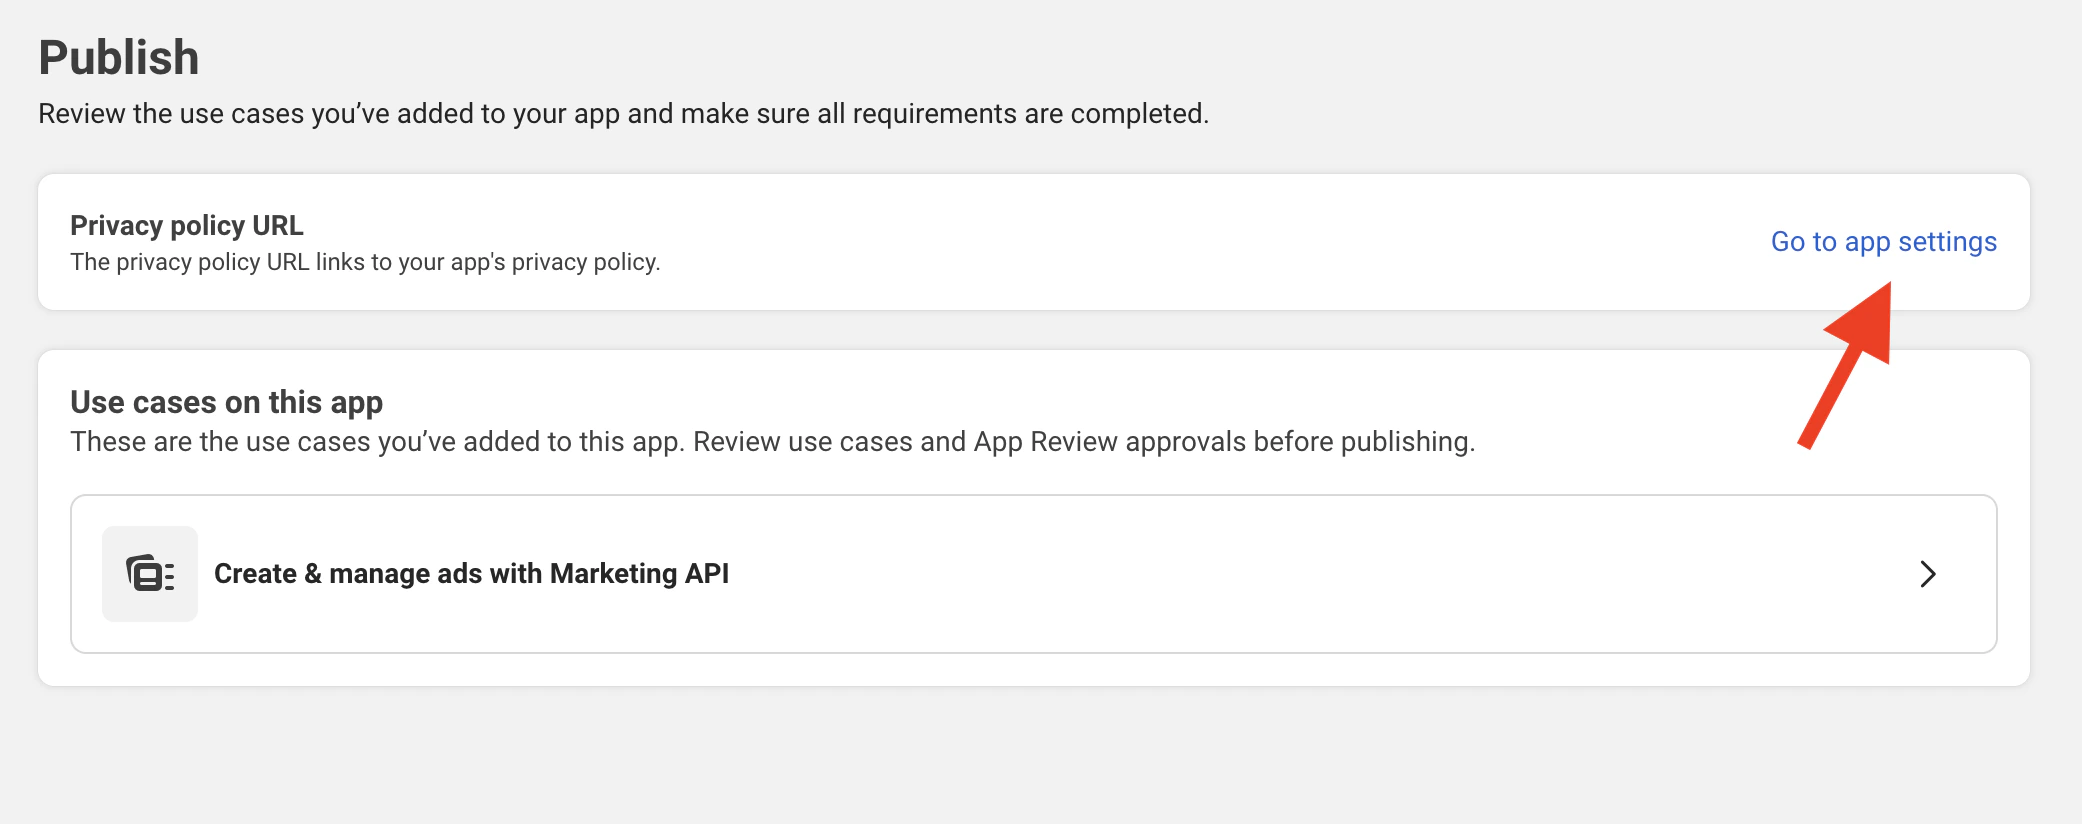
From the Dashboard sidebar, click **Publish**.
***
## Step 5: Configure App Settings and Publish
Configure your app's privacy policy and publish it to enable full functionality.
From the Dashboard sidebar, click **Publish**.
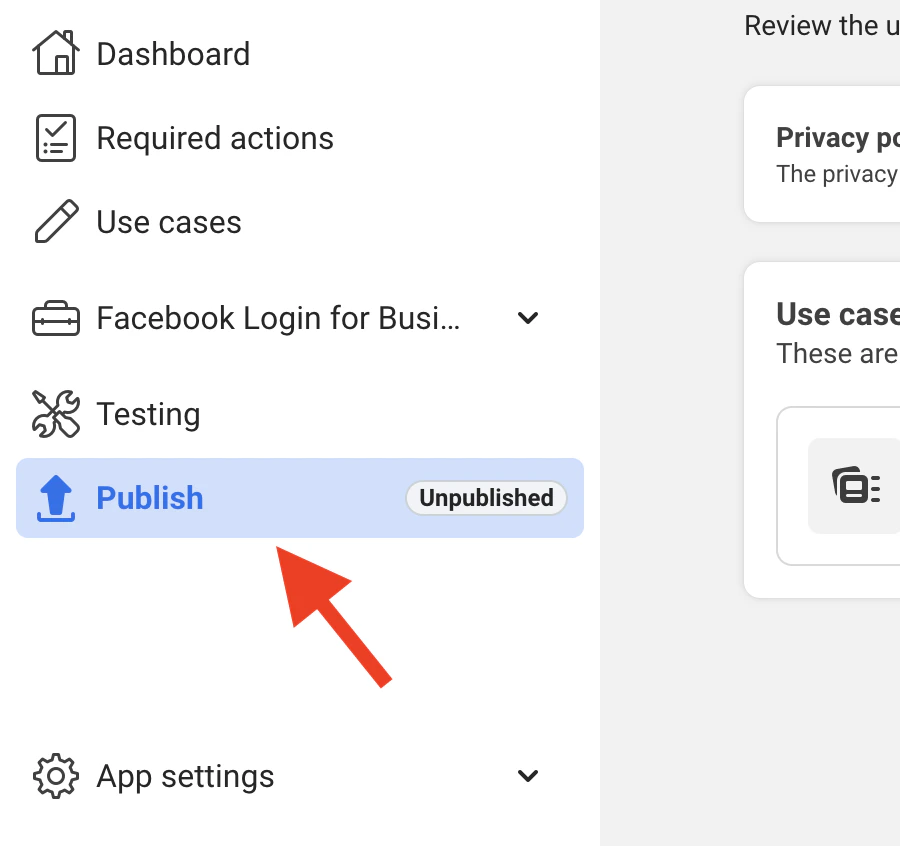 Click **Go to App Settings** next to Privacy Policy URL.
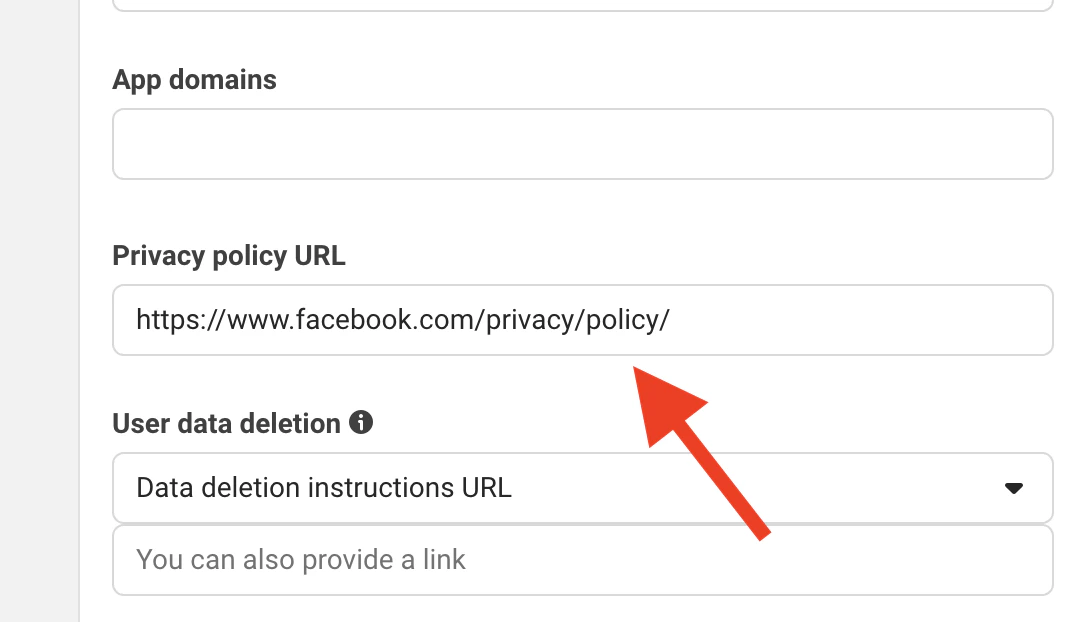
 Enter a valid privacy policy page URL.
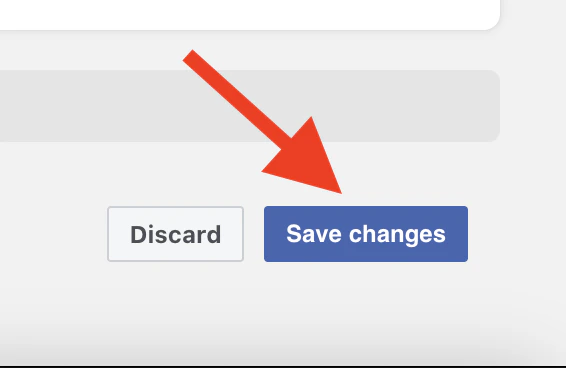
 Click **Save Changes**.
 Go back to the **Publish** section in the sidebar.
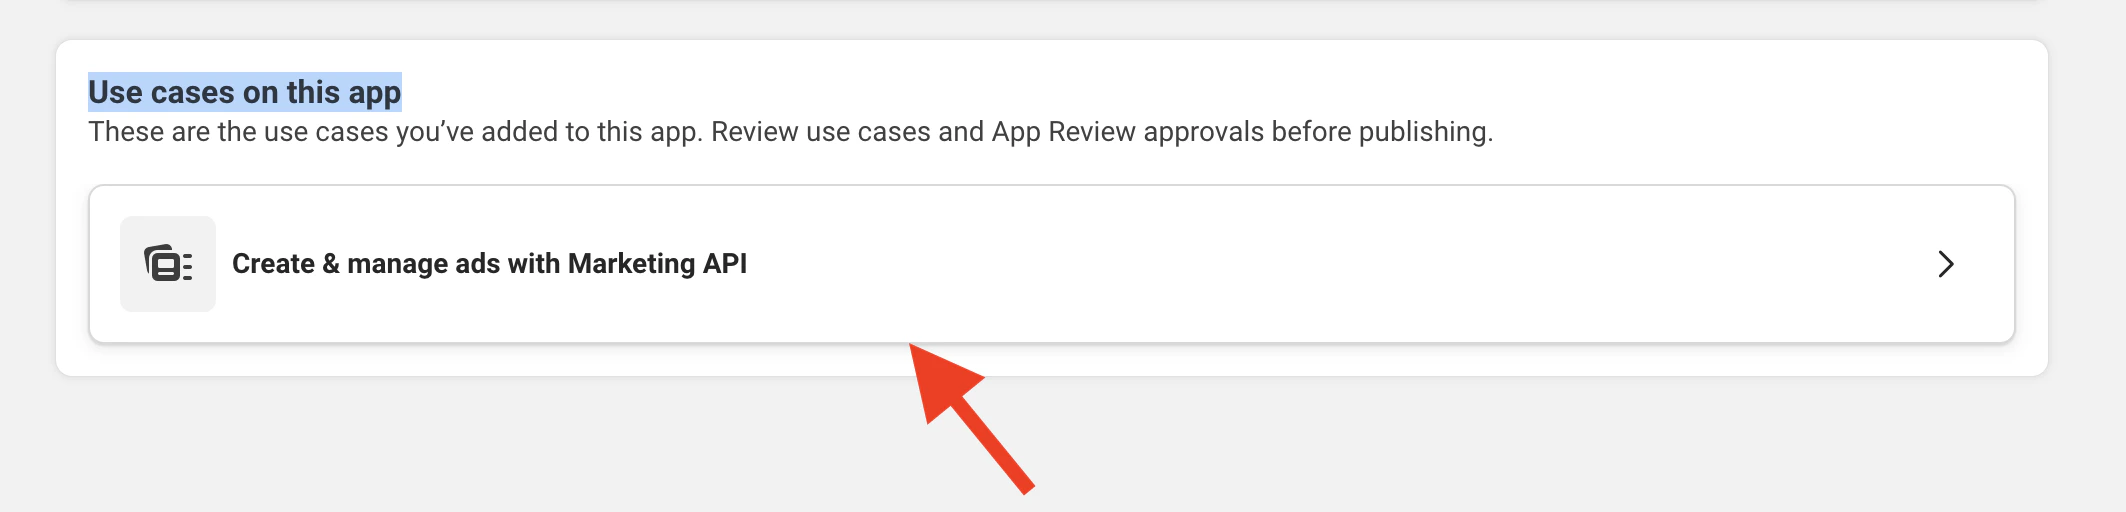
In **Use cases on this app**, select **Create & manage ads with Marketing API**.
Go back to the **Publish** section in the sidebar.
In **Use cases on this app**, select **Create & manage ads with Marketing API**.
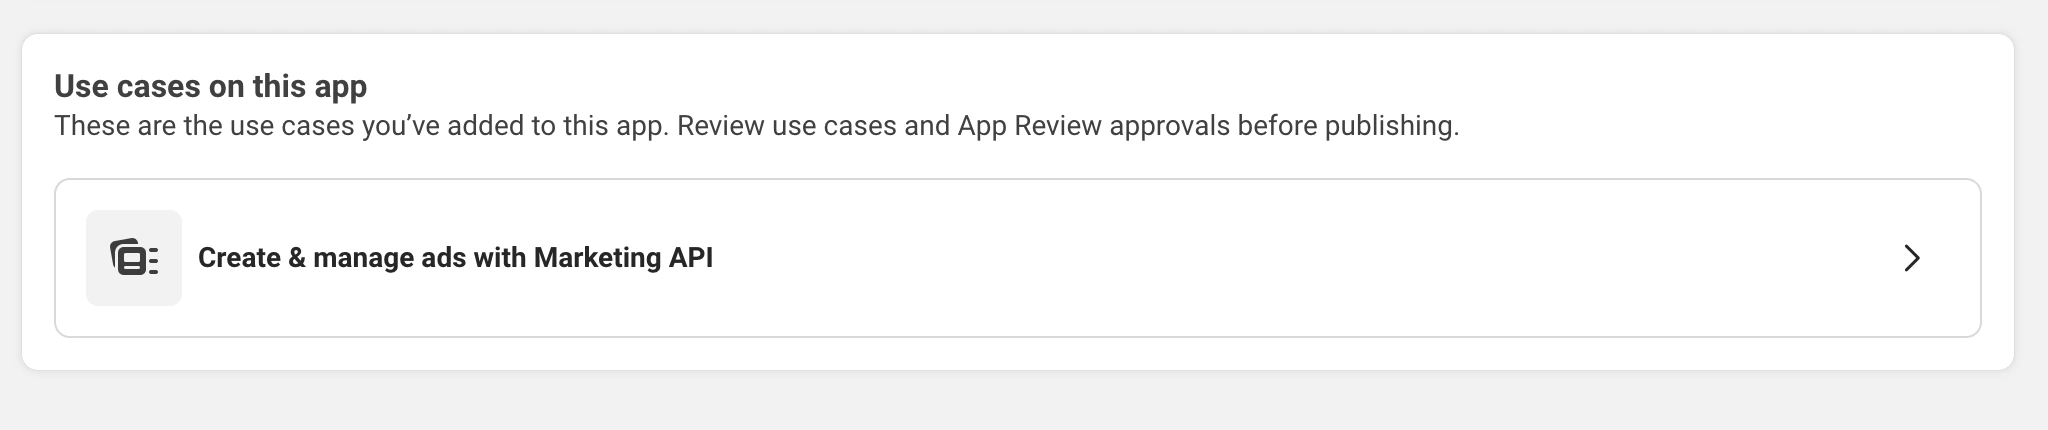 After reviewing **Use Case**, go back & click **Publish** to make your app live.
 ***
## Step 6: Create a System User
Create a System User for programmatic API access without personal account dependencies.
Go to **Business Settings** → **System Users** under the **Users** section.
***
## Step 6: Create a System User
Create a System User for programmatic API access without personal account dependencies.
Go to **Business Settings** → **System Users** under the **Users** section.
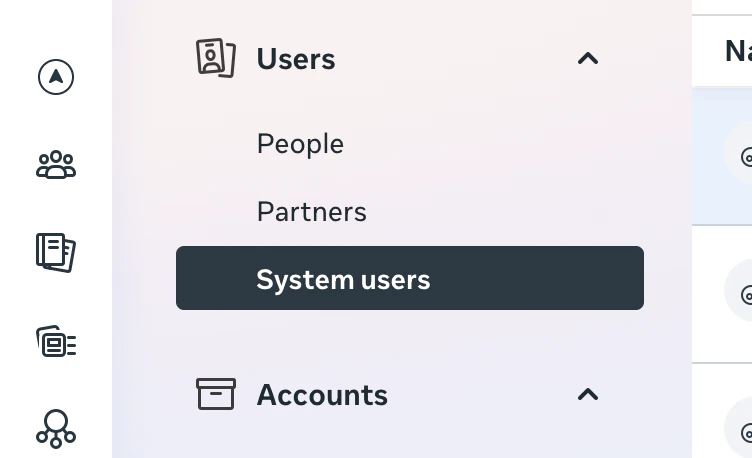 Click **Add** and enter a **System User Name** (e.g., "Olympus Integration").
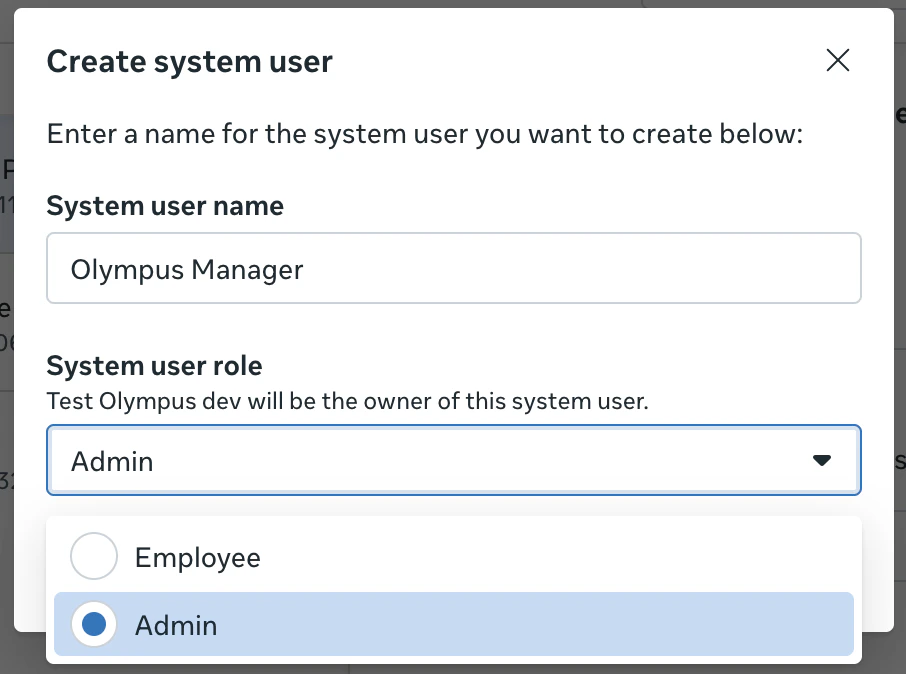 Set **System User Role** to **Admin** and click **Create System User**.
***
## Step 7: Assign Assets to System User
Grant your System User access to the necessary business assets.
Select your system user and click **Assign Assets**.
Set **System User Role** to **Admin** and click **Create System User**.
***
## Step 7: Assign Assets to System User
Grant your System User access to the necessary business assets.
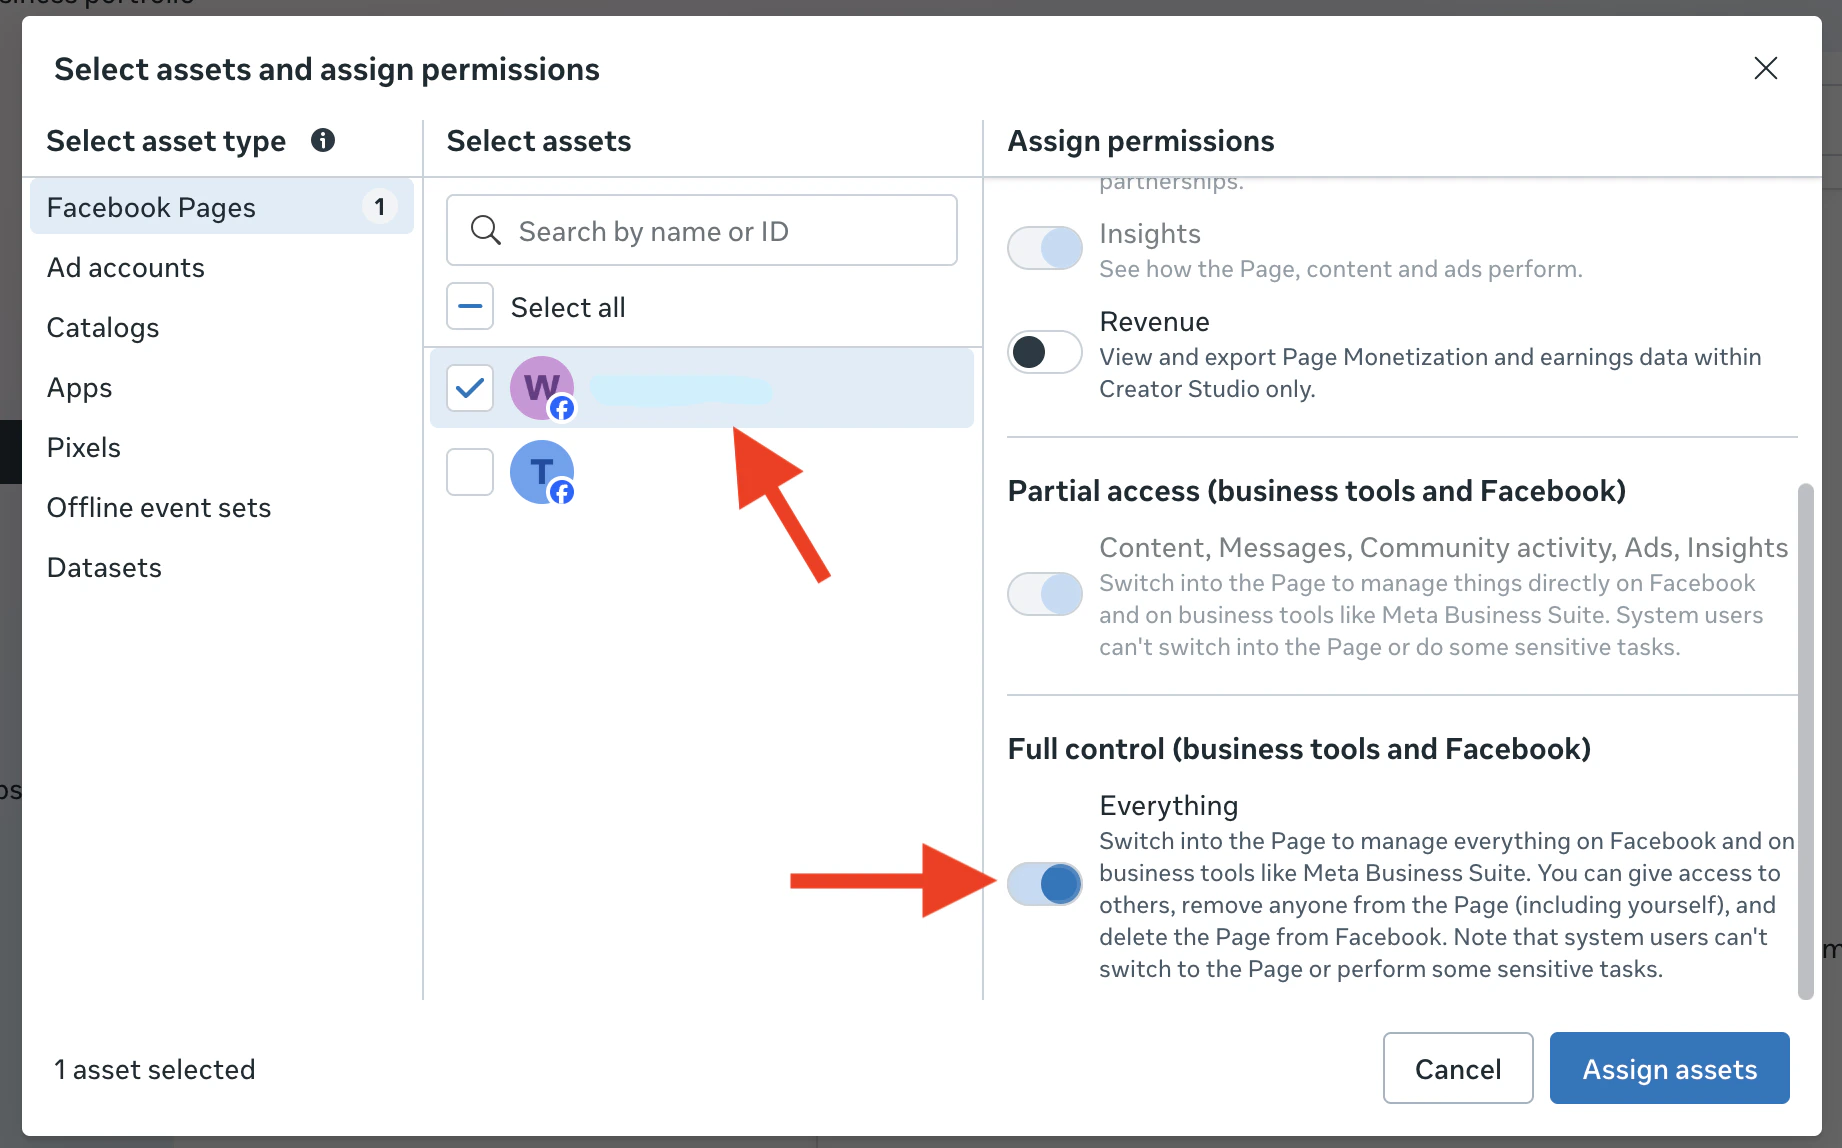
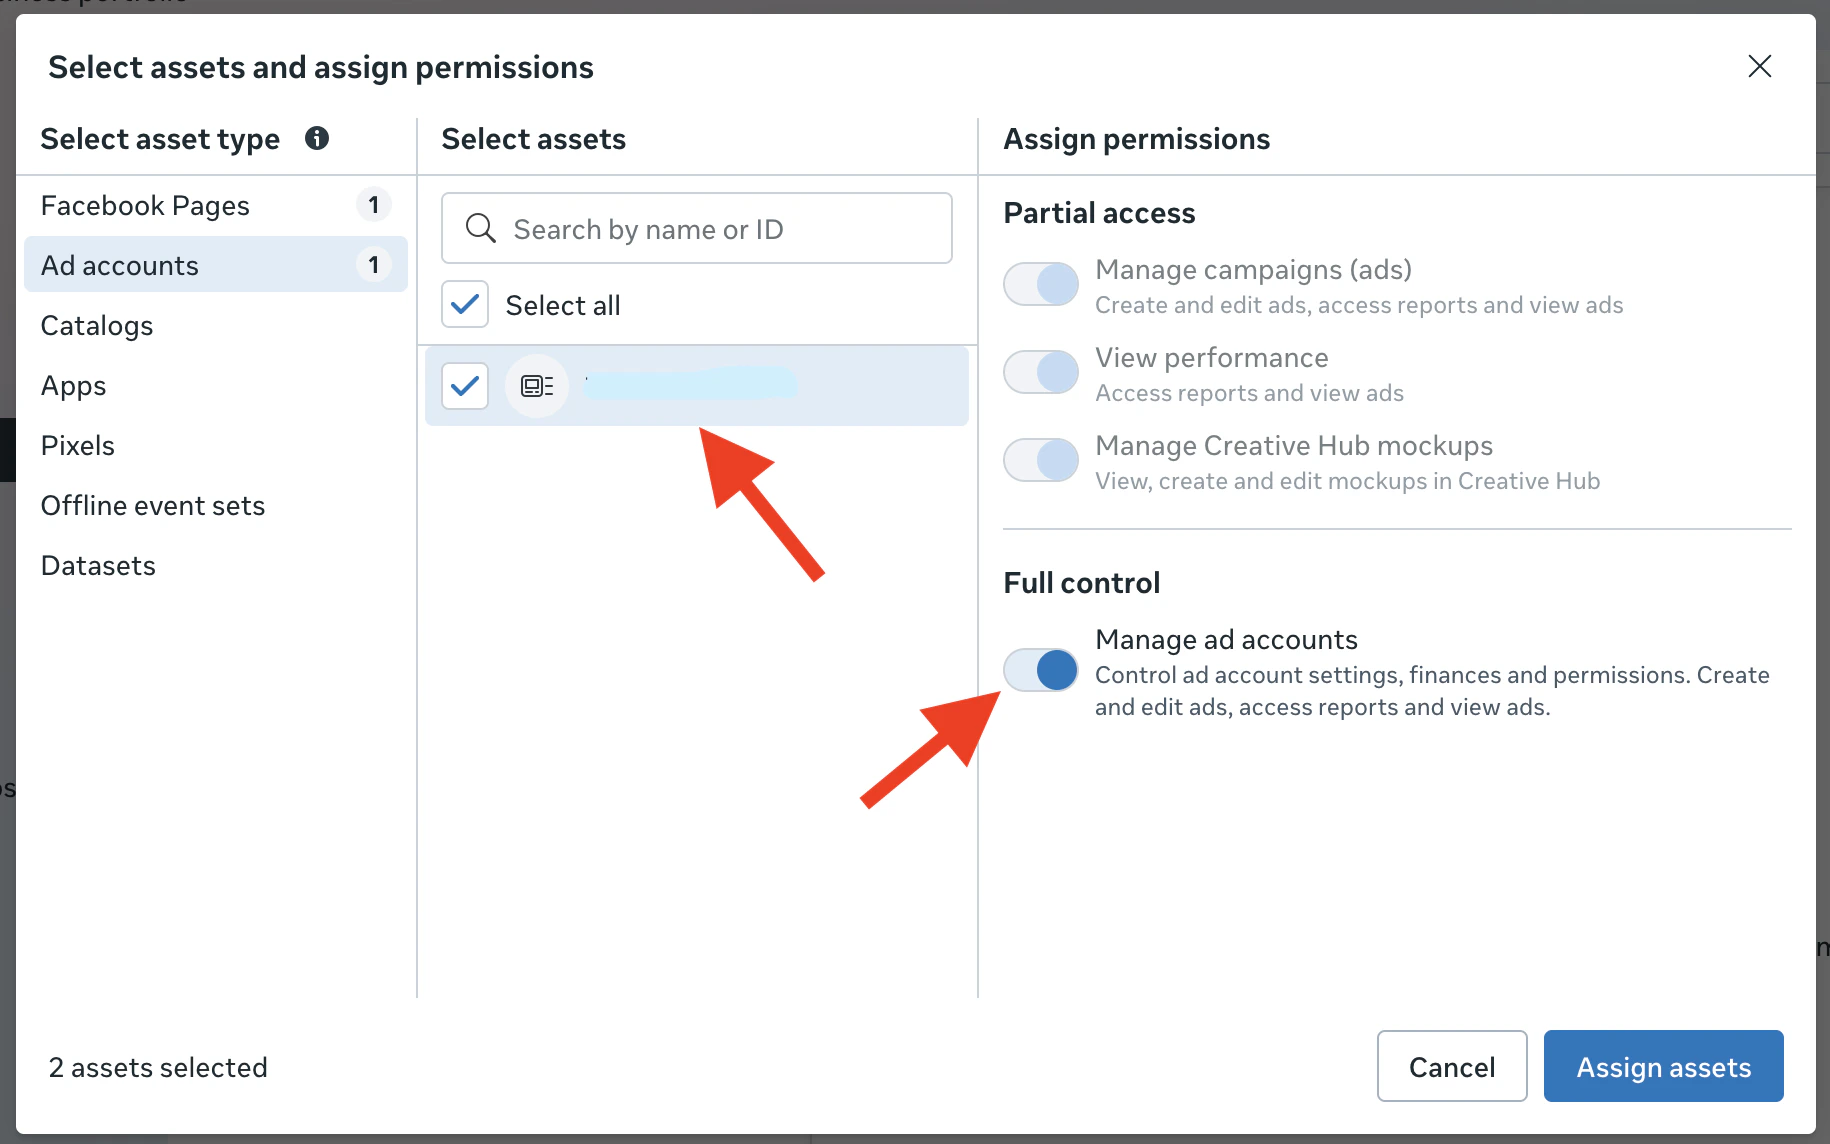
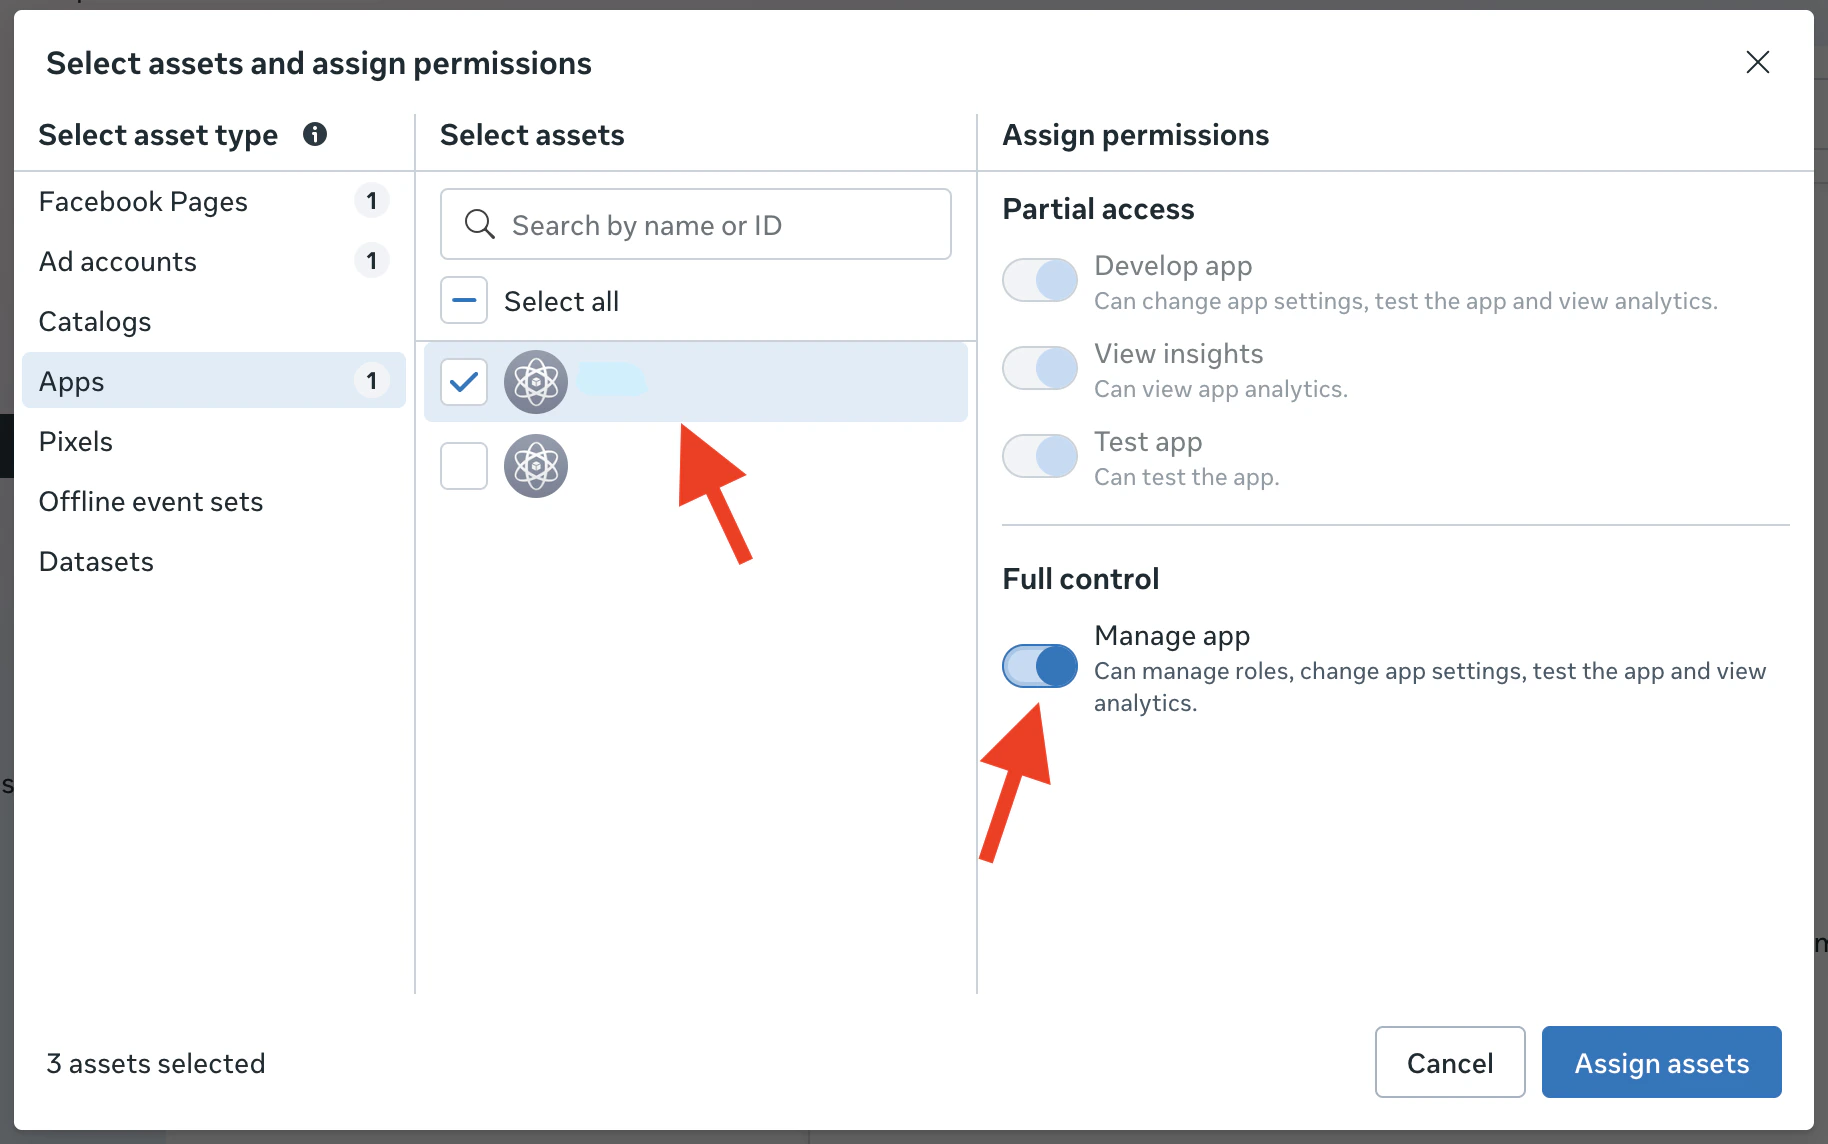
Select your system user and click **Assign Assets**.
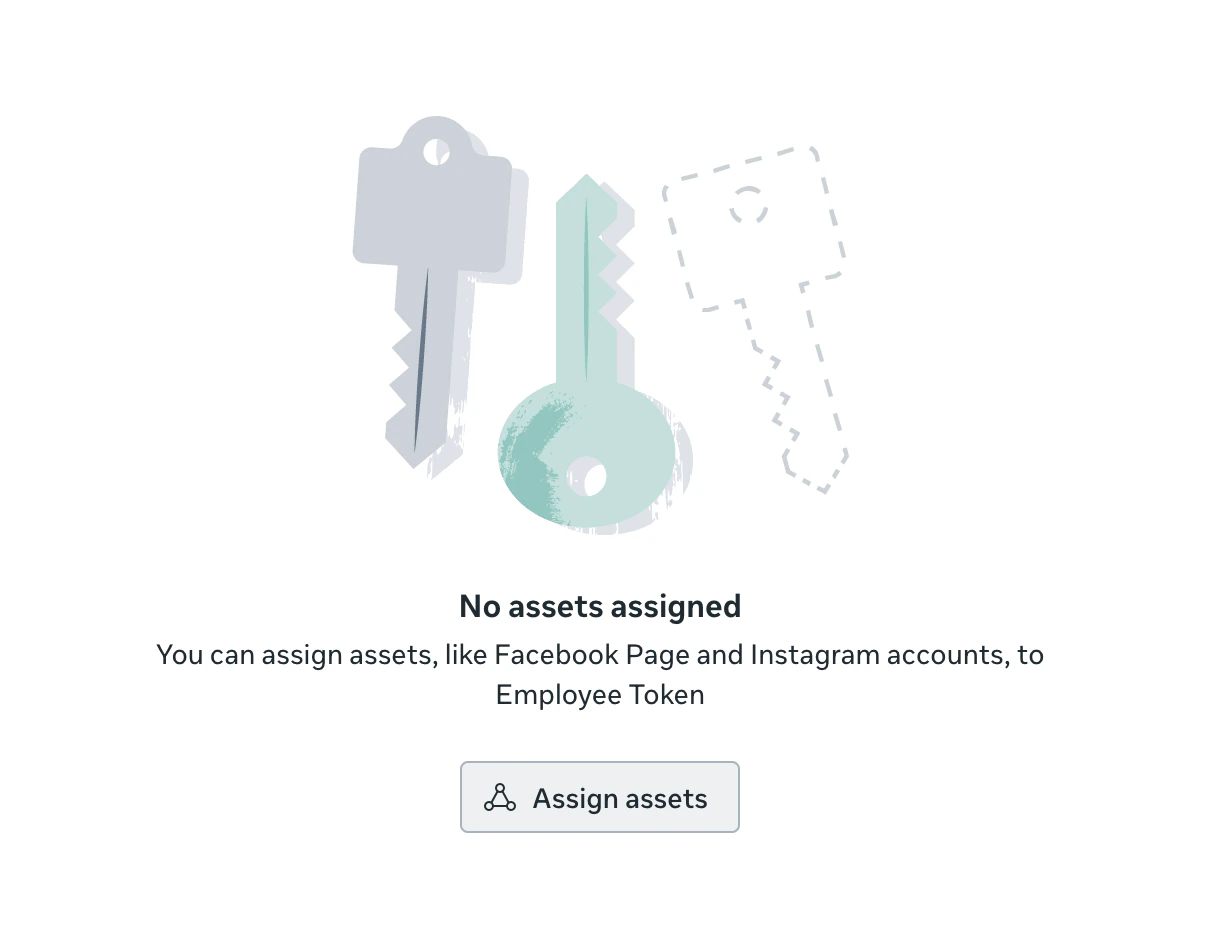 Select **Pages** → choose your page → turn on **Full Access**.
 Select **Ad Accounts** → choose your ad account → turn on **Manage Ad Accounts**.
 Select **Apps** → choose your app → turn on **Manage App** → click **Assign Assets**.
 ***
## Step 8: Assign System User to App
Add your System User directly to the app with full control permissions.
Go to **Apps** from the Business Settings sidebar.
Select your app and click **Assign People**.
***
## Step 8: Assign System User to App
Add your System User directly to the app with full control permissions.
Go to **Apps** from the Business Settings sidebar.
Select your app and click **Assign People**.
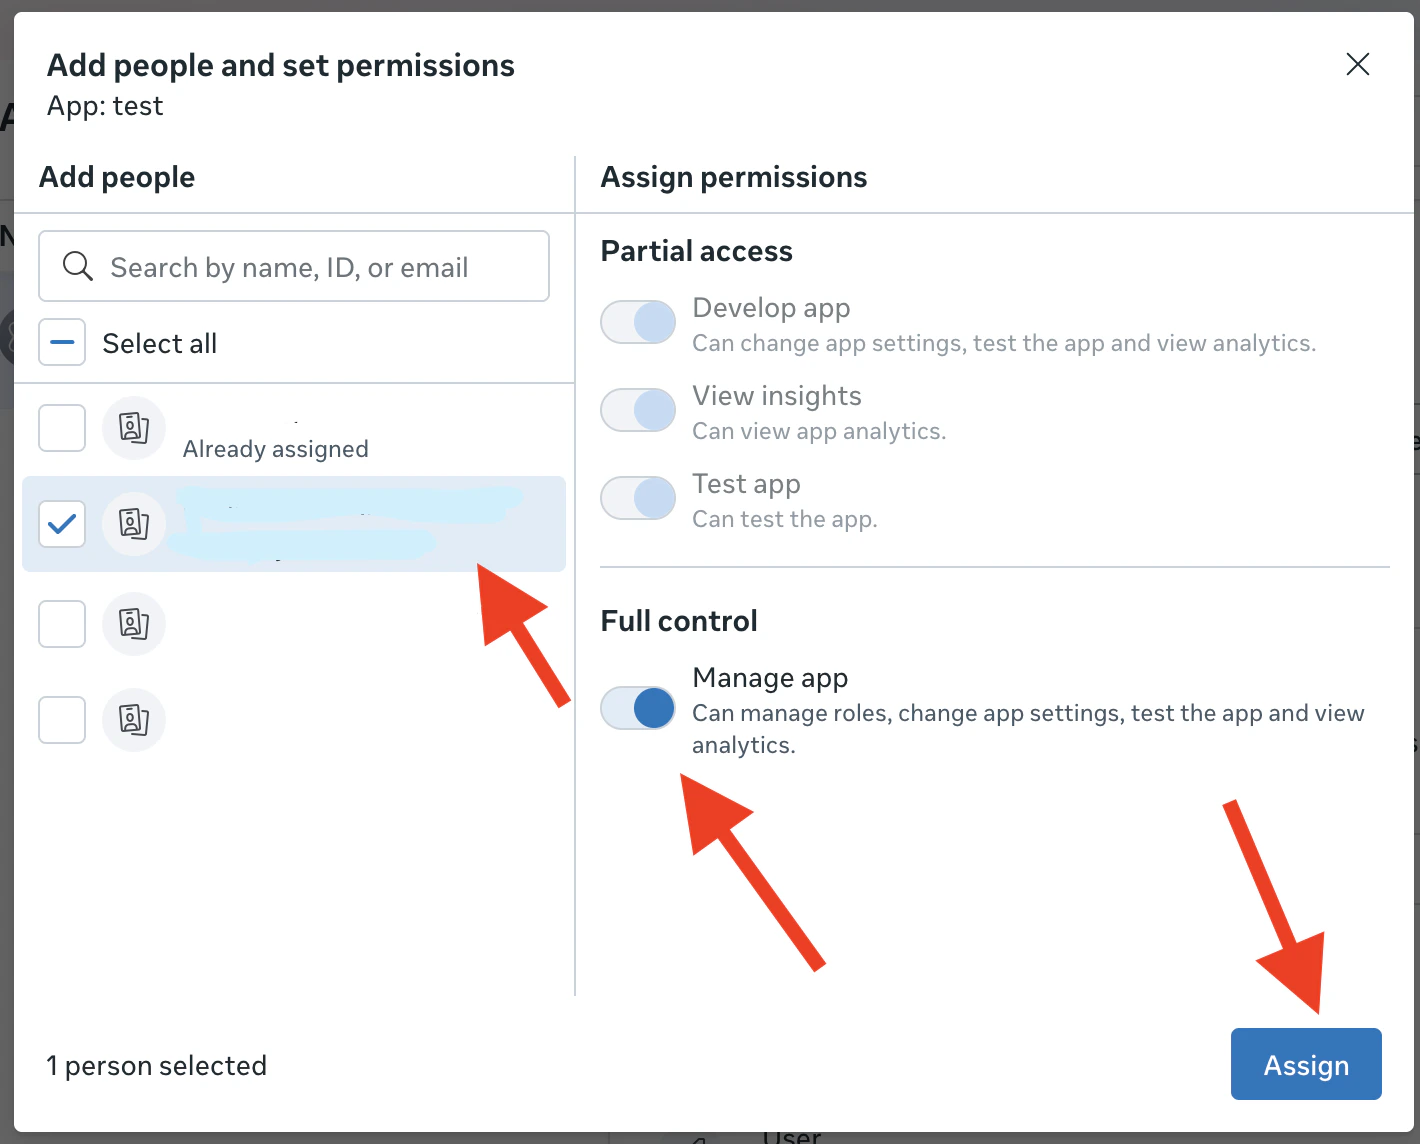
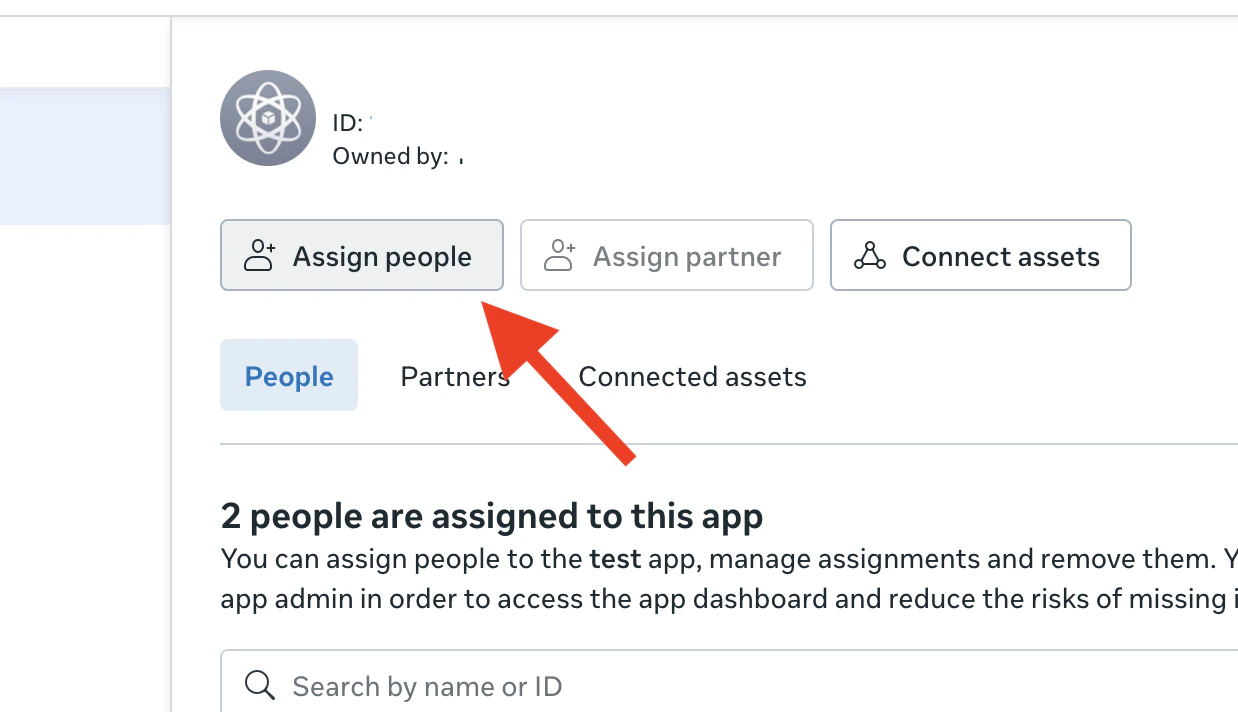 Select the created System User → turn on **Manage App (Full Control)** → click **Assign**.
 ***
## Step 9: Generate System User Access Token
Generate a permanent access token for your System User.
Go back to **System Users** and select your system user.
Click **Generate Token**.
***
## Step 9: Generate System User Access Token
Generate a permanent access token for your System User.
Go back to **System Users** and select your system user.
Click **Generate Token**.
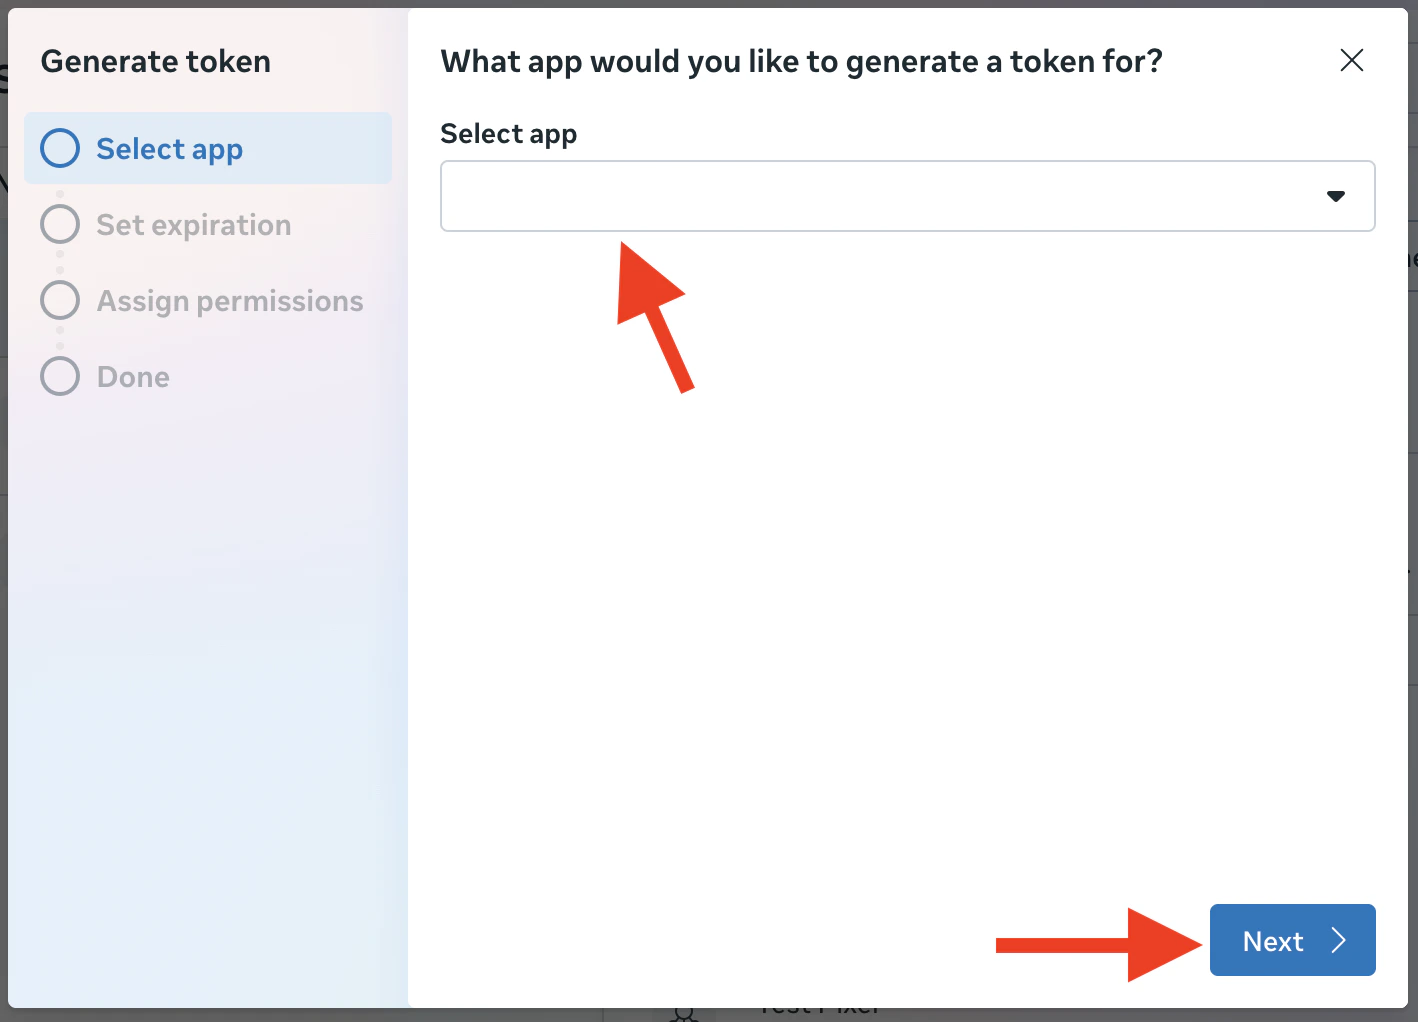
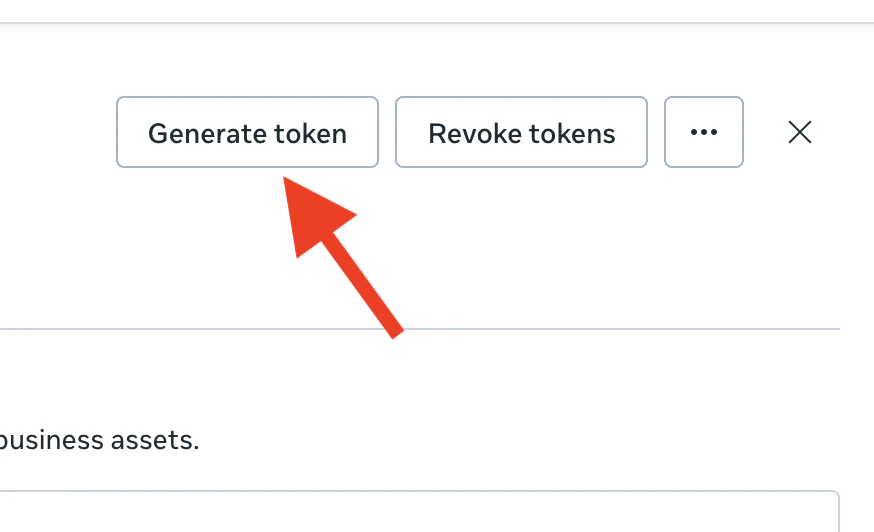 Select your app from the dropdown and click **Next**.
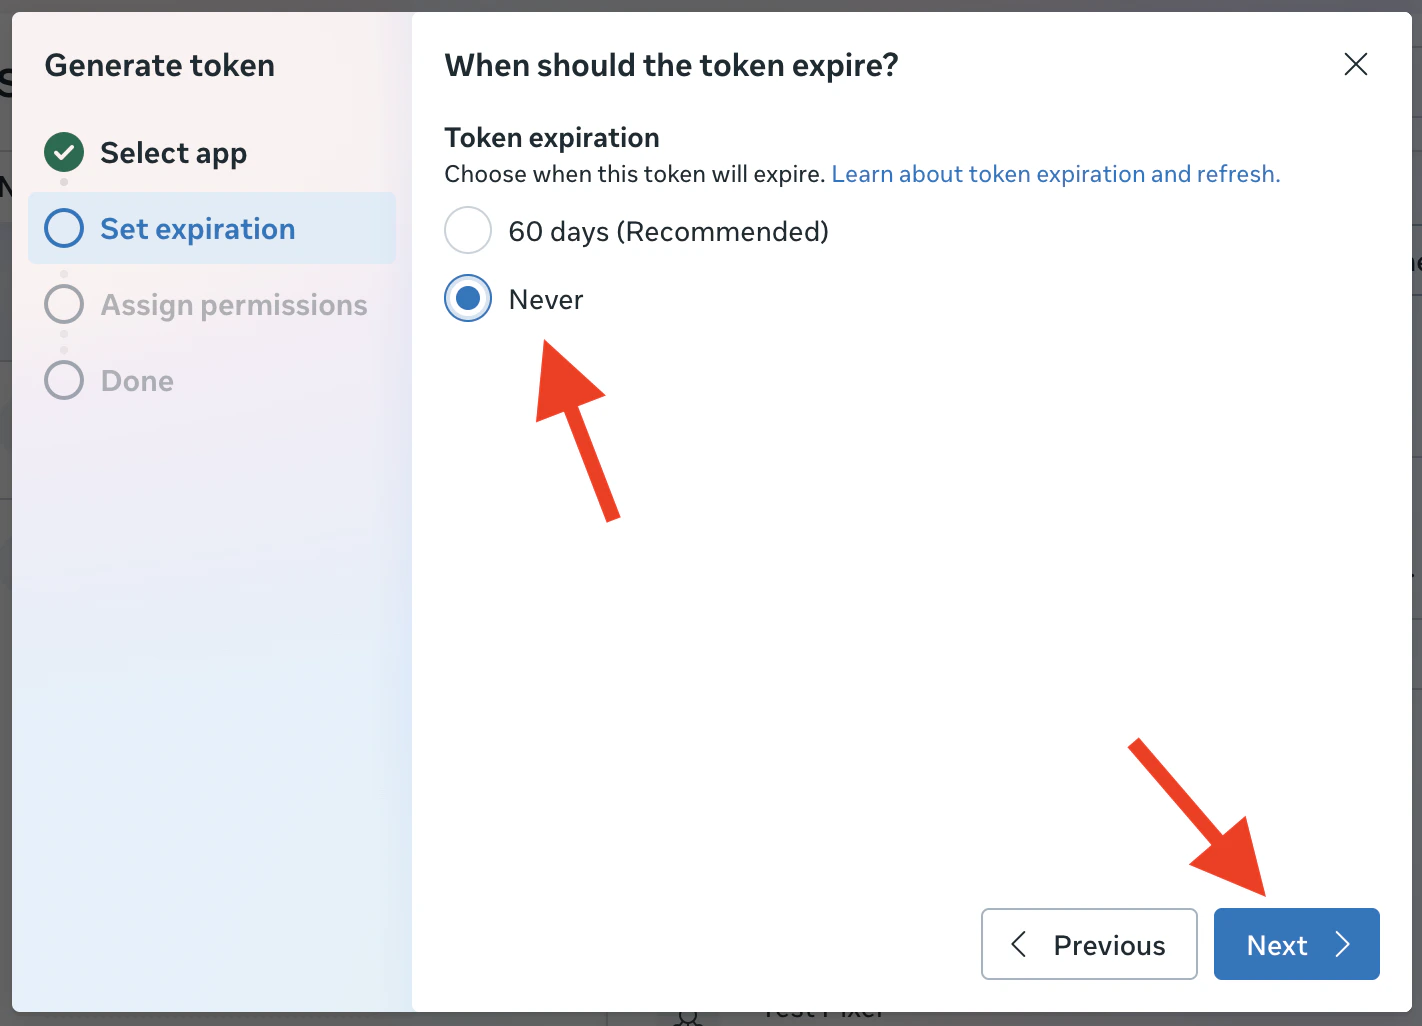
 Set **Expiration** to **Never** and click **Next**.
 Select the following permissions required for Olympus integration:
* **ads\_management** - Create and manage ads
* **ads\_read** - Read ad account data and insights
* **business\_management** - Manage business assets and settings
* **pages\_show\_list** - List and access Facebook pages
* **pages\_read\_engagement** - Read page engagement metrics
Click **Generate Token** after selecting all permissions.
Select the following permissions required for Olympus integration:
* **ads\_management** - Create and manage ads
* **ads\_read** - Read ad account data and insights
* **business\_management** - Manage business assets and settings
* **pages\_show\_list** - List and access Facebook pages
* **pages\_read\_engagement** - Read page engagement metrics
Click **Generate Token** after selecting all permissions.
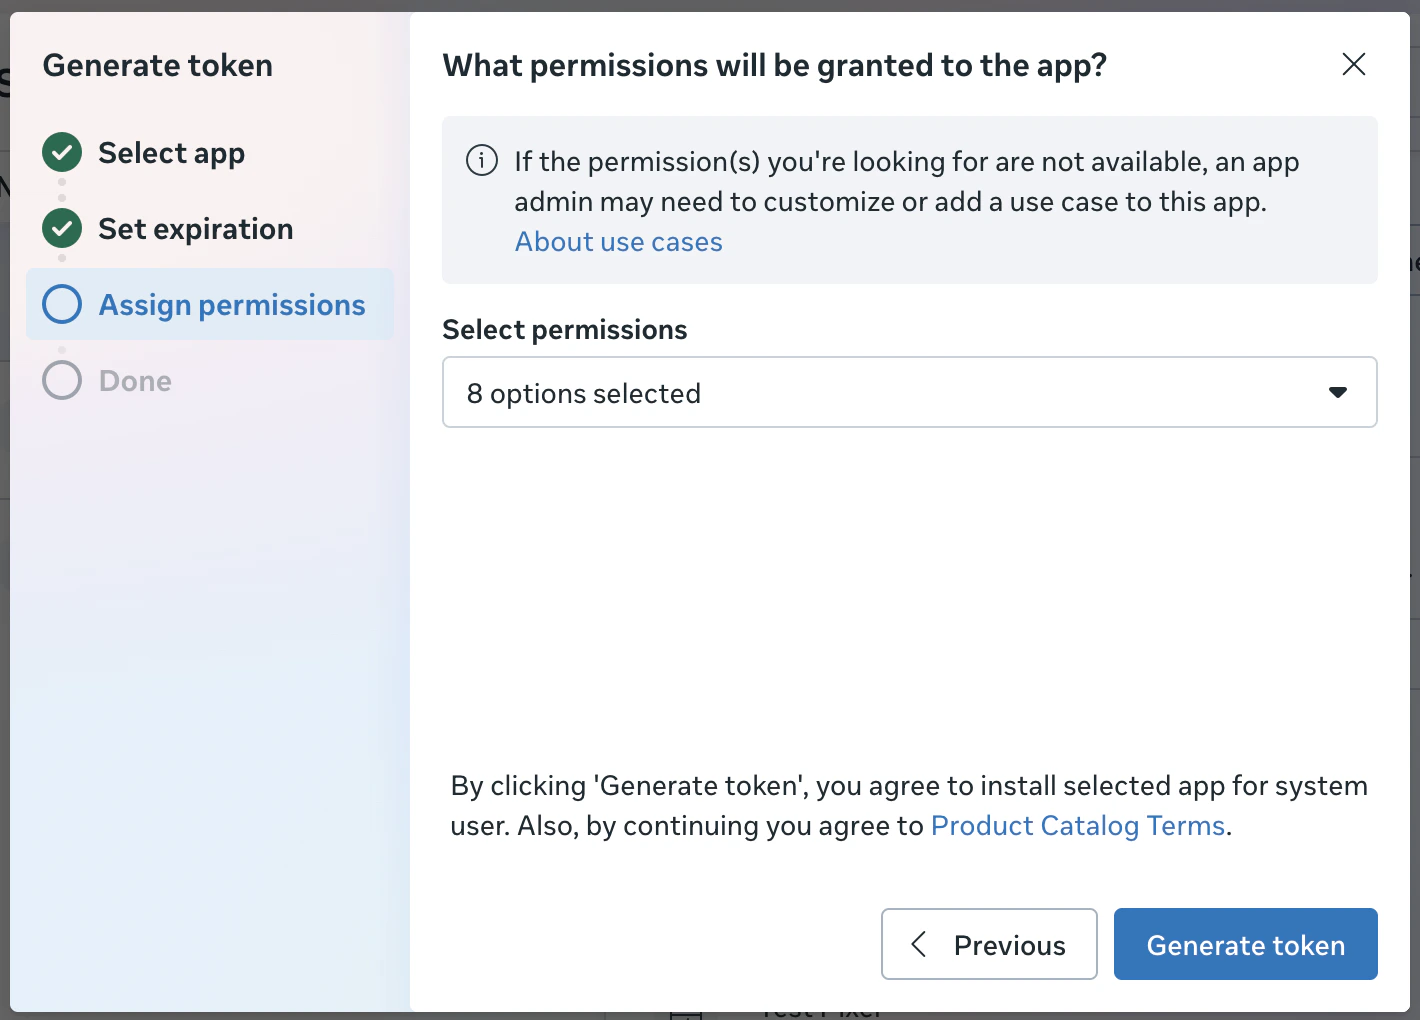 Copy the generated token and store it securely. You will need this for the Olympus connection.
**Important**: Store your access token securely. This token provides full access to your Meta Business assets and should never be shared publicly.
***
## Step 10: Connect Meta Integration to Olympus
Complete the integration by connecting your token to Olympus.
Go to **Olympus** → **Integrations** from the main navigation.
Click **CONNECT** on the Meta integration card.
Paste your **System User Access Token** and click **CONNECT**.
Copy the generated token and store it securely. You will need this for the Olympus connection.
**Important**: Store your access token securely. This token provides full access to your Meta Business assets and should never be shared publicly.
***
## Step 10: Connect Meta Integration to Olympus
Complete the integration by connecting your token to Olympus.
Go to **Olympus** → **Integrations** from the main navigation.
Click **CONNECT** on the Meta integration card.
Paste your **System User Access Token** and click **CONNECT**.
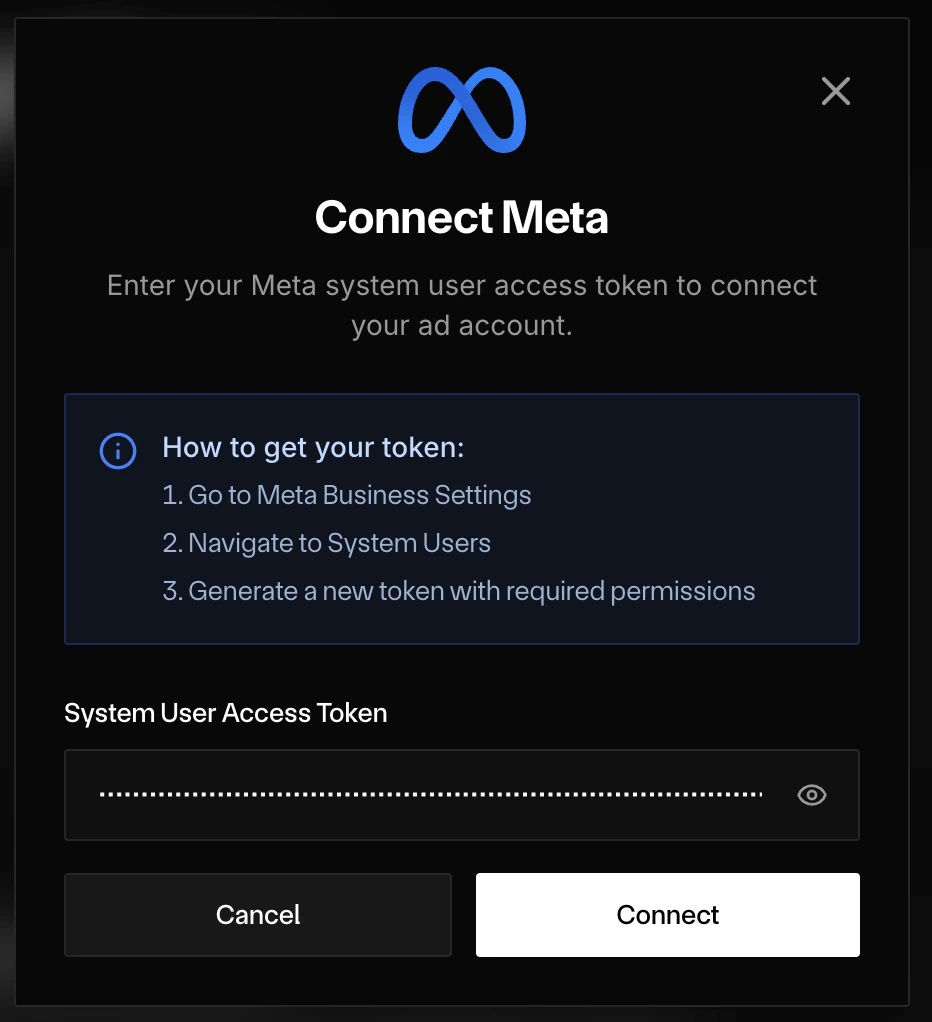 Your Meta integration is now connected and ready to use with Olympus.
***
## After connecting
### Disconnect Meta
The Meta card on the **Integrations** page shows a **Connected** badge.
Your Meta integration is now connected and ready to use with Olympus.
***
## After connecting
### Disconnect Meta
The Meta card on the **Integrations** page shows a **Connected** badge.
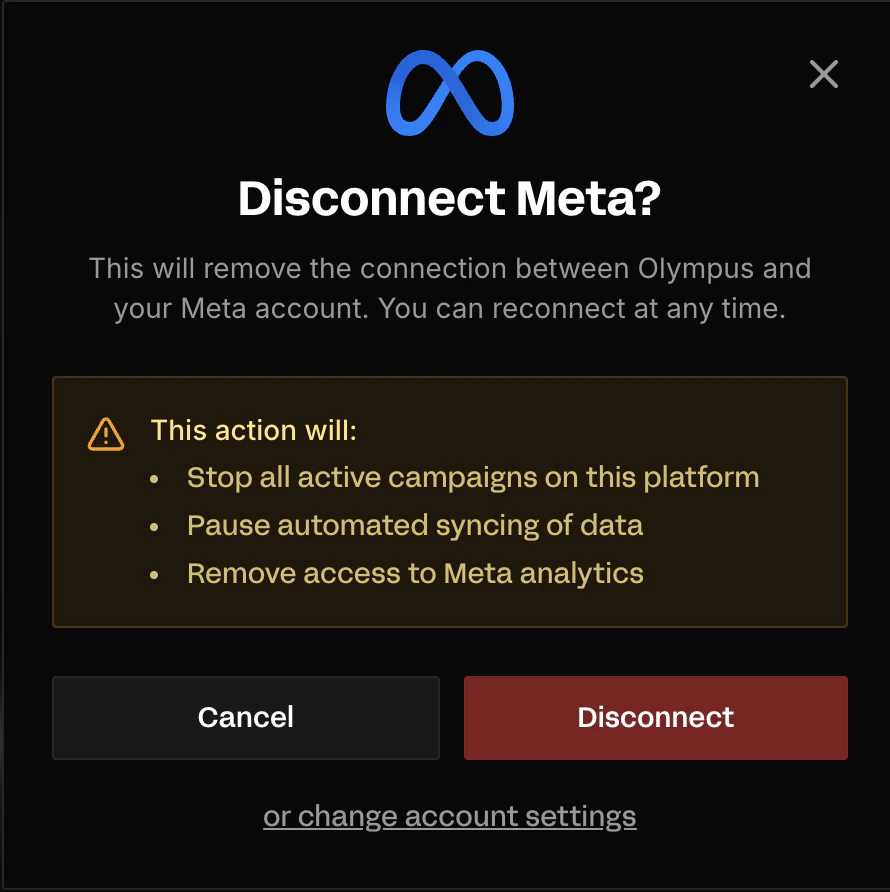
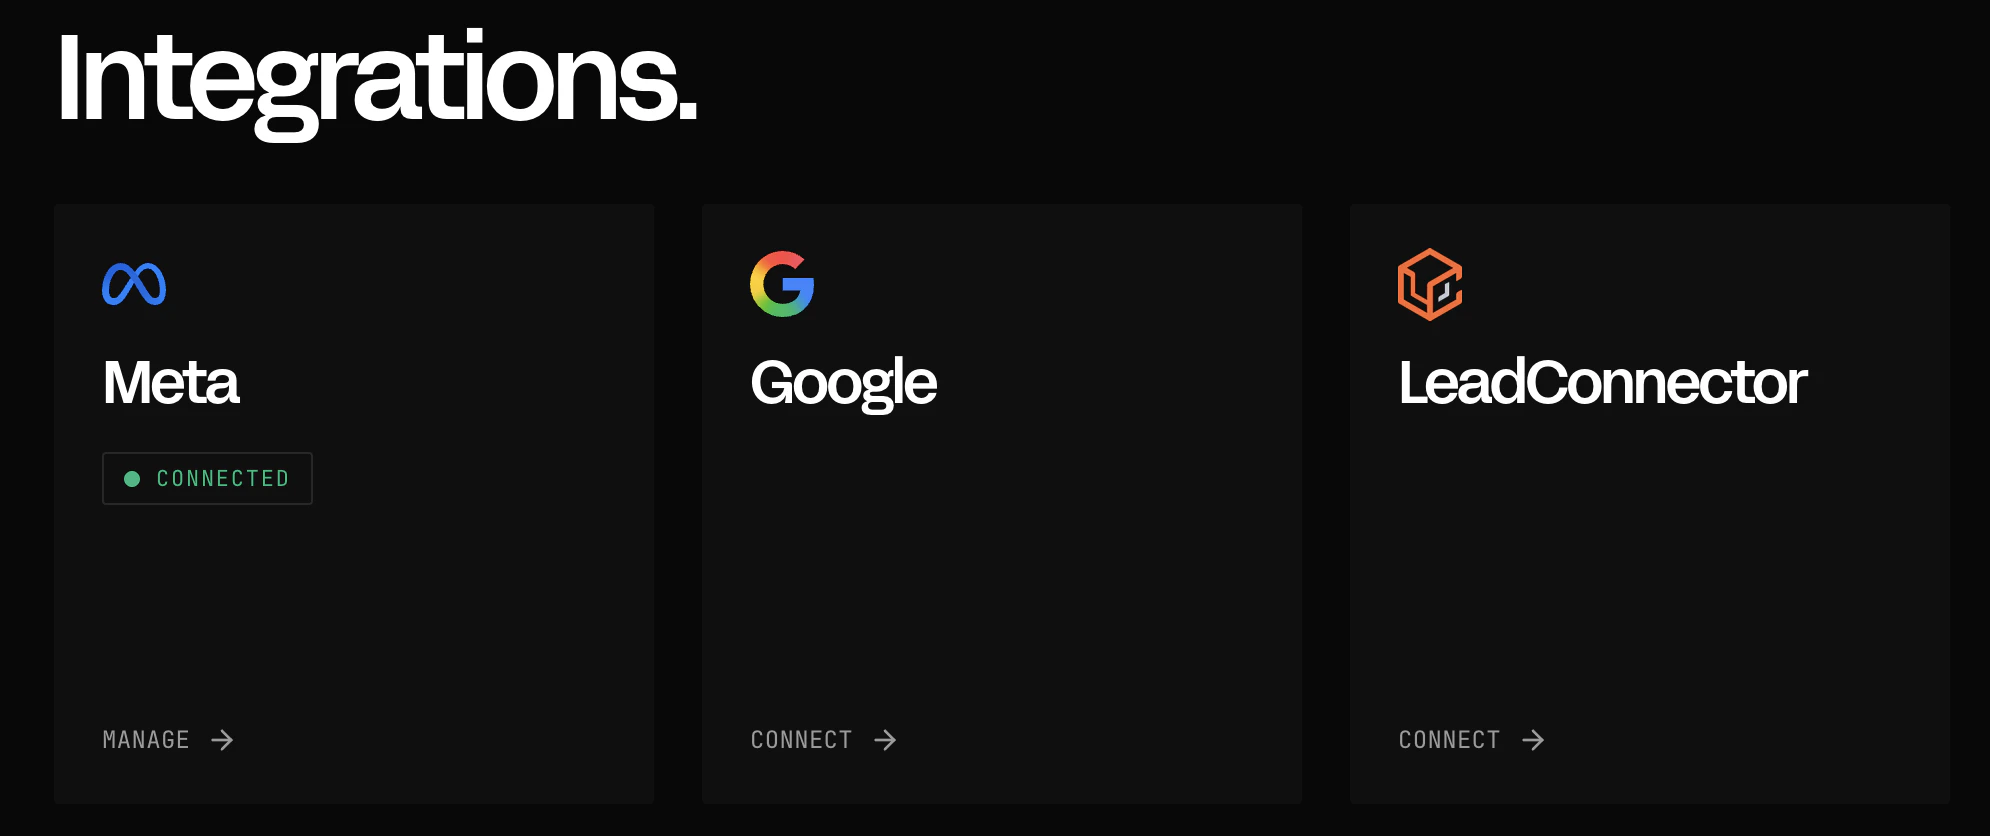 Click **Manage** in the bottom left corner of the card to open a pop-up where you can disconnect or change your account settings.
 ### Changing account settings
To change which Meta ad account or Facebook page Olympus uses for campaigns:
1. Click **Manage** on the Meta integration card, then click **"or change account settings"** at the bottom of the pop-up.
2. Select your preferred **Ad Account** and **Facebook Page** from the dropdowns.
3. Click **Save Changes**.
### Changing account settings
To change which Meta ad account or Facebook page Olympus uses for campaigns:
1. Click **Manage** on the Meta integration card, then click **"or change account settings"** at the bottom of the pop-up.
2. Select your preferred **Ad Account** and **Facebook Page** from the dropdowns.
3. Click **Save Changes**.
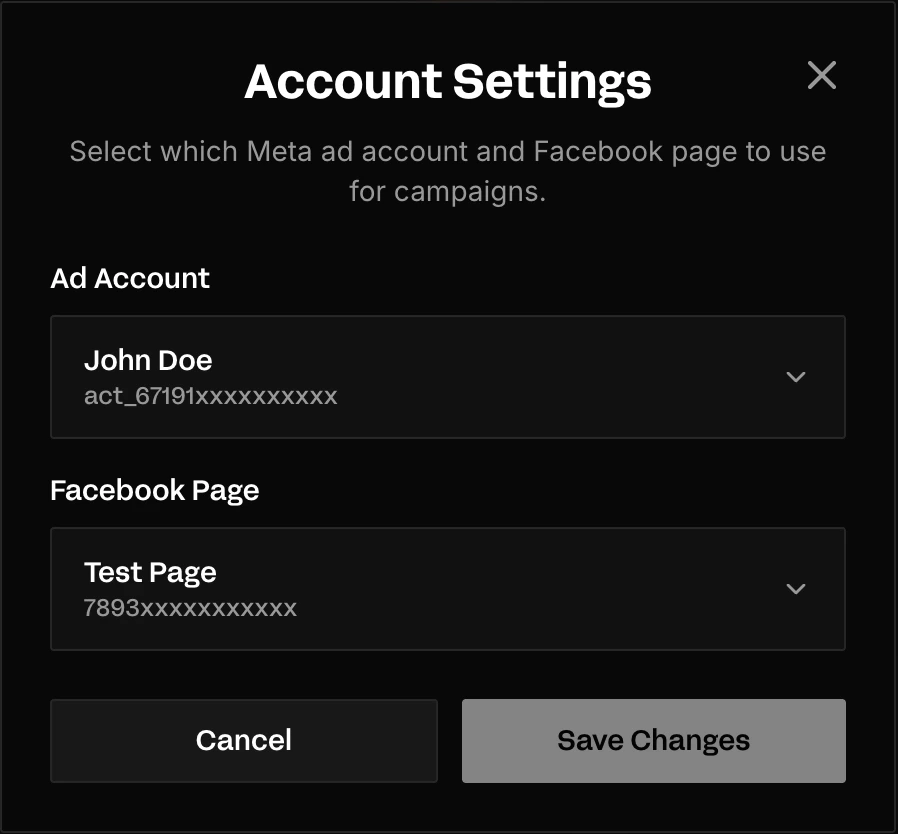 Only ad accounts and pages associated with your connected Meta Business account will appear in the dropdowns.
System User tokens set to "Never" expiration do not expire, so you will not need to reconnect periodically.
Never share your System User Access Token. If compromised, immediately revoke it from Business Settings and generate a new one.
***
## Troubleshooting
If your token stops working, verify that:
* Your app is still published
* The System User still has all required asset permissions
* The token was generated with "Never" expiration
Generate a new token if issues persist.
If certain features don't work, check that:
* Your System User has Admin role
* All assets (Pages, Ad Accounts, Apps) are assigned with full access
* All permissions were selected during token generation
If API calls fail, ensure your app is published:
* Go to your app in Facebook Developers
* Navigate to Publish section
* Verify the app status shows as "Live"
## What to do next
Return to [Integrations](/modules/integrations) to check your other connections, or start building campaigns in [Drive](/modules/drive).
Only ad accounts and pages associated with your connected Meta Business account will appear in the dropdowns.
System User tokens set to "Never" expiration do not expire, so you will not need to reconnect periodically.
Never share your System User Access Token. If compromised, immediately revoke it from Business Settings and generate a new one.
***
## Troubleshooting
If your token stops working, verify that:
* Your app is still published
* The System User still has all required asset permissions
* The token was generated with "Never" expiration
Generate a new token if issues persist.
If certain features don't work, check that:
* Your System User has Admin role
* All assets (Pages, Ad Accounts, Apps) are assigned with full access
* All permissions were selected during token generation
If API calls fail, ensure your app is published:
* Go to your app in Facebook Developers
* Navigate to Publish section
* Verify the app status shows as "Live"
## What to do next
Return to [Integrations](/modules/integrations) to check your other connections, or start building campaigns in [Drive](/modules/drive).